Sunday 24 March 2013

Periscope

I had a Daniel D block from way back.  It only came with the centre lens.  Then DroidWelder very kindly ran a small run of hollow shafts, he also made me a cap and riser.  These went together great.  

Then i got Rotopod's DD lighting kit, and nothing fits because of the nuts for the shafts.

I considered having the shafts remade to thread into the block so there was no invasion of the space in the block.  But that would have taken ages to sort and would mean that all 3 shafts would need replacing.

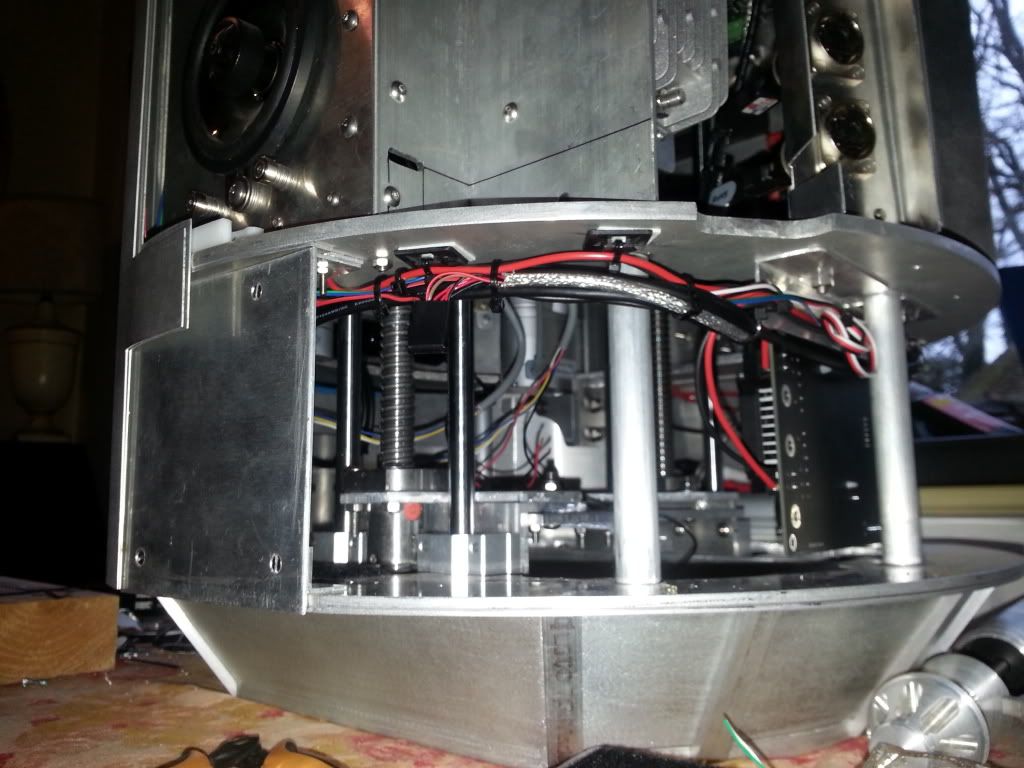
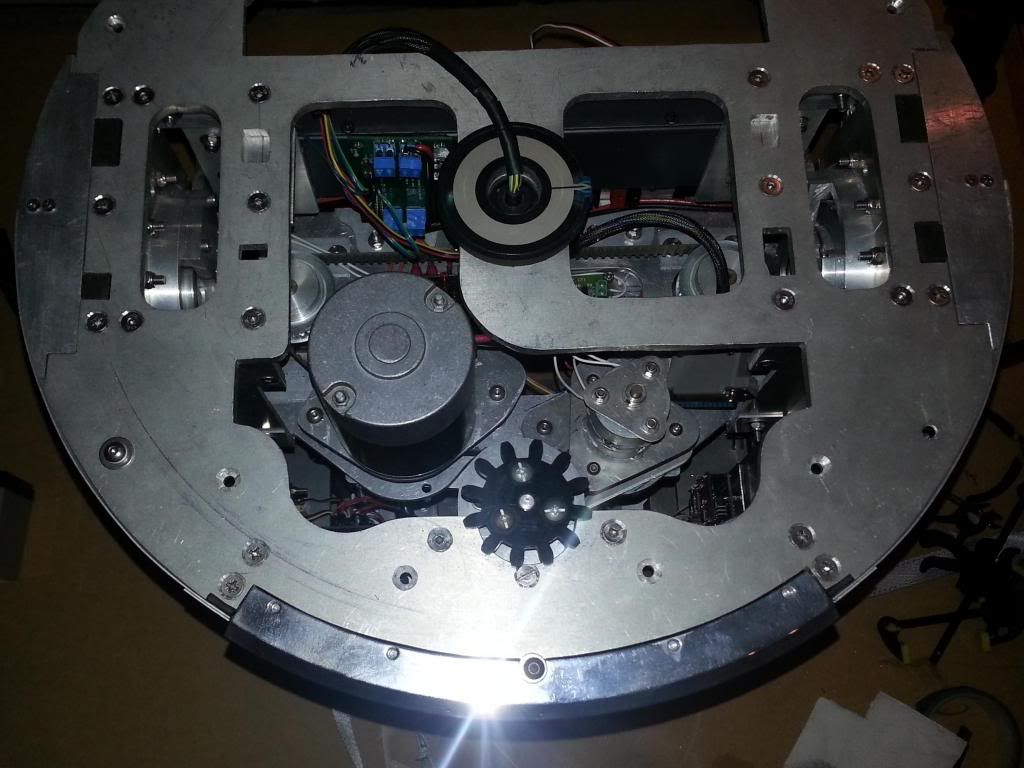
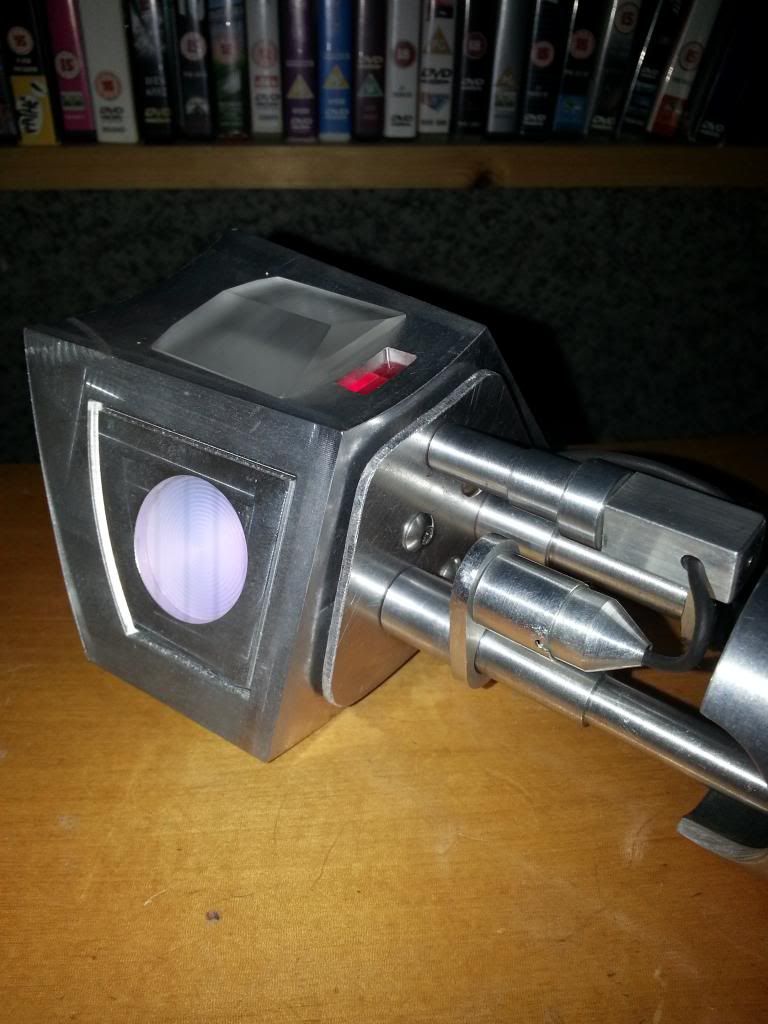
So i decided to use a drop plate to mount the shafts to, cut the block to allow room for the nuts, and mount the plate using 3 M4 button heads located so that the lighting kit can still be installed.  The thinking was sound, but in reality, the nuts were too thick and still came into the block by about 1.5mm.  So i used 2 washers on each M4 bolt to space the plate off and sink the nuts the extra distance needed.  I really like the look, it suits the rest of the droid. :)  And because that wasn't Conan, it gave me a little more flexibility elsewhere. :) 

I decided that being custom I could do a custom arrangement of the shafts too.  So I swapped the extras and flipped one to mount above the O rings on one side.  I'm really please with the look.

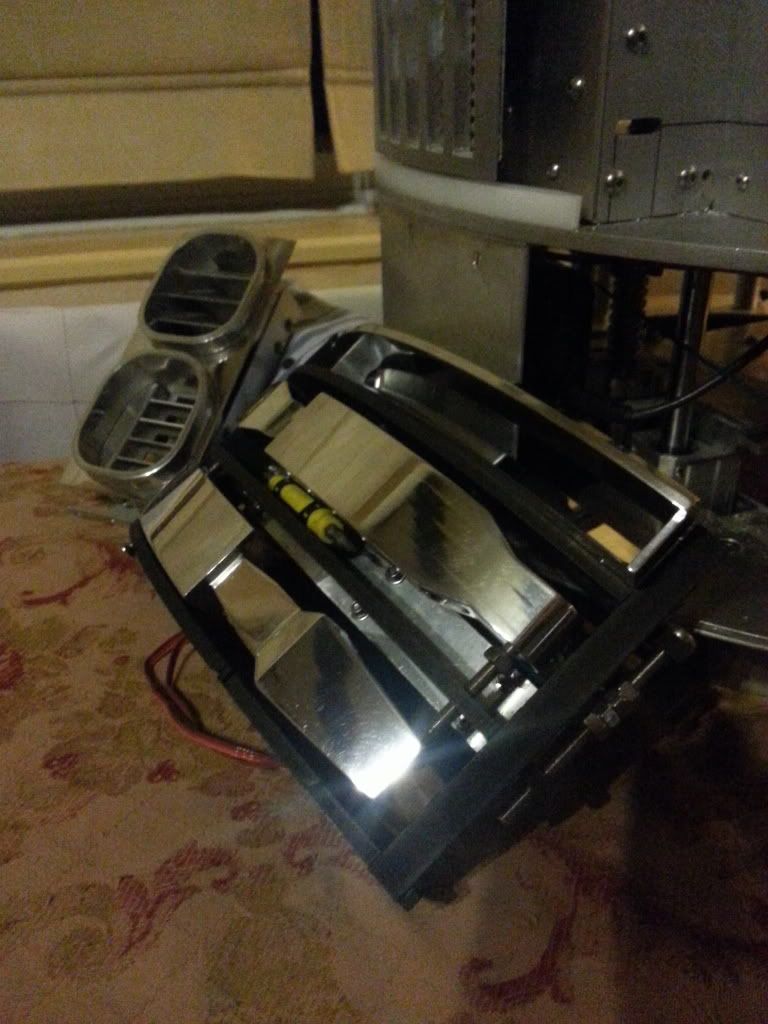
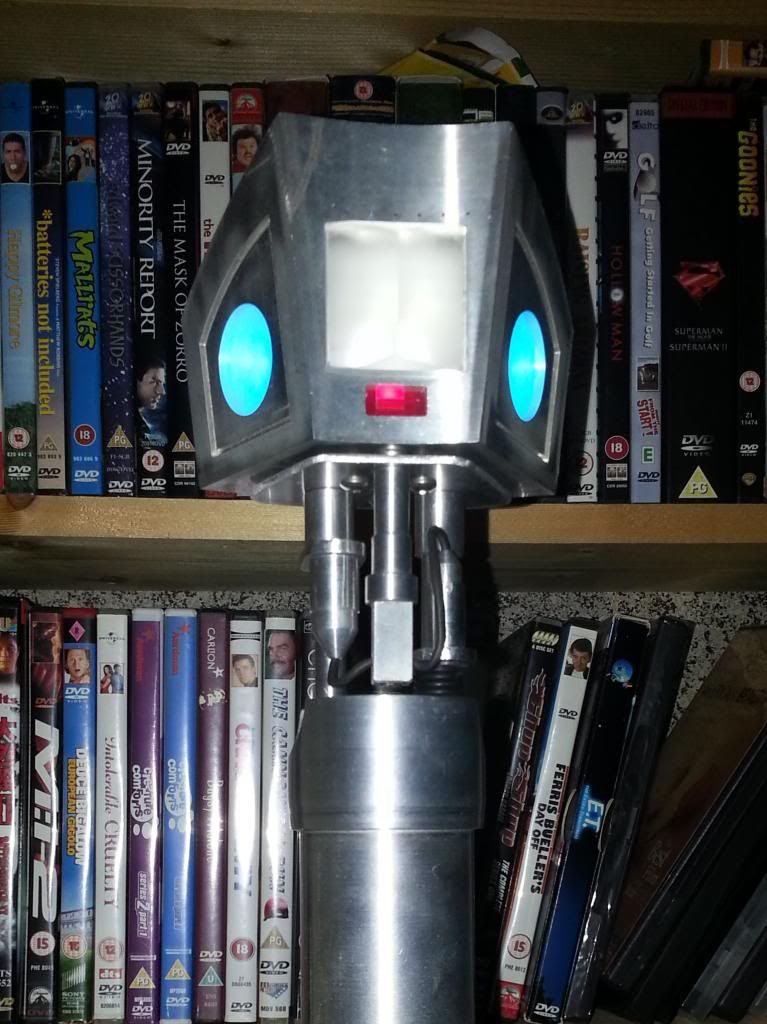
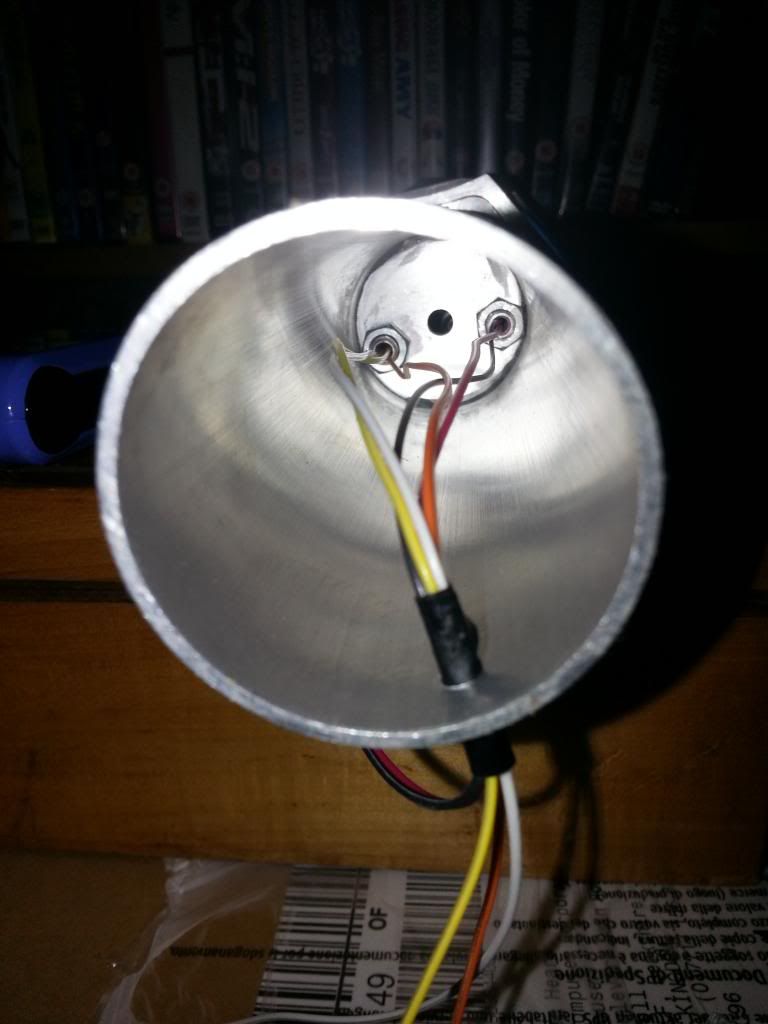
So once the shafts were all thread locked and glued up and straight, I started looking at the wiring.  I started by fitting the front LED block, these required quite a bit of filing, but once they were the right size it slipped in and out ok.  Then I added the leads for the rear LEDs (mine are on the opposite sides).  The rubber side inserts didnt line up well on the DD kit, so I decided to use them as lenses and cut them out and glue them into the sides, the circles now radiate from the centre of the hole now, and look so much better not being set back so far.  Then I popped it all out and added 5 wires to the bottom.  The Power and GND go down one hole and the ABC lines go down the other. With that done i looked at the rear LEDs, i decided to mount these and use 2 pin connectors directly to the LEDs to allow easier removal of the setup.

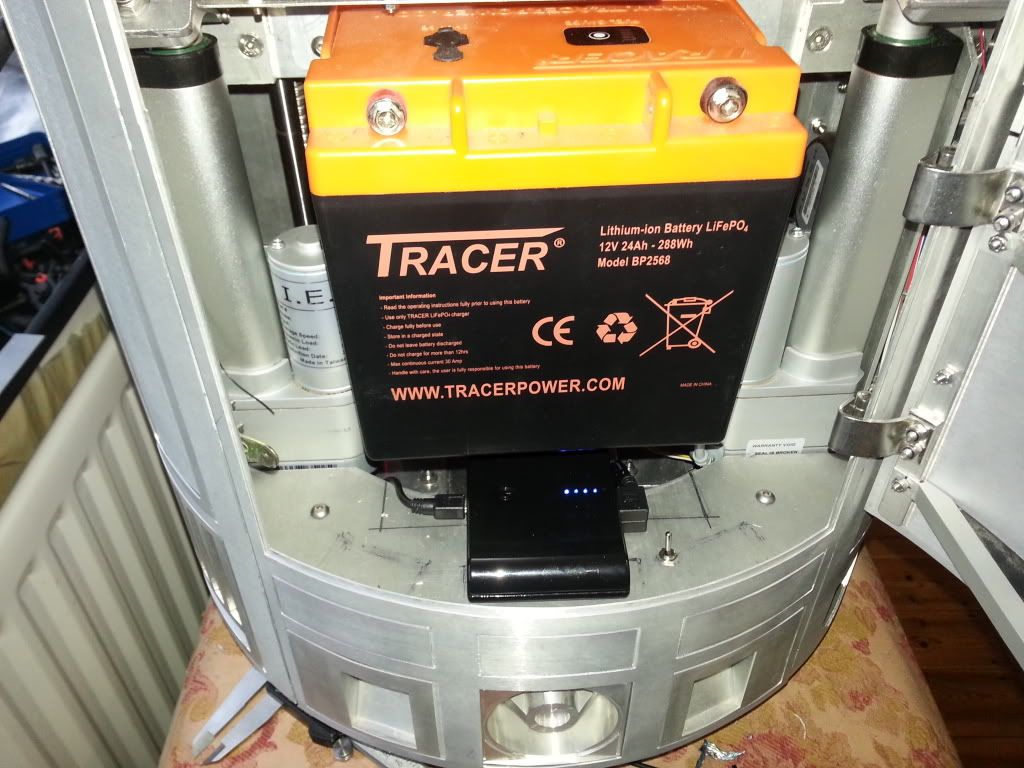
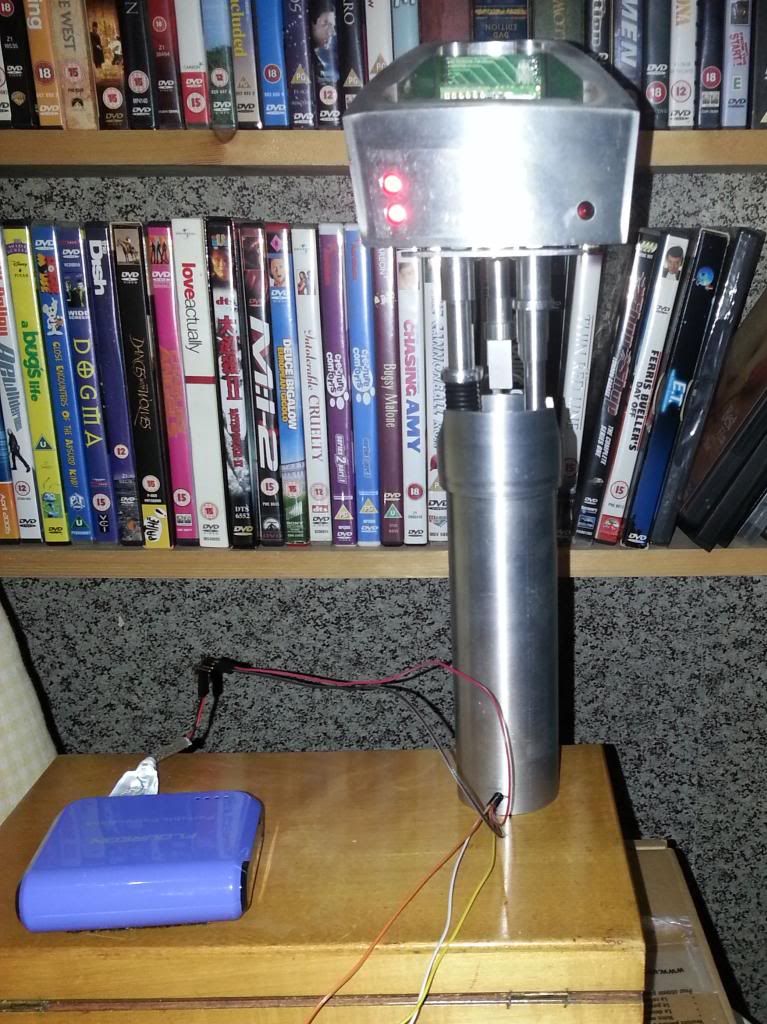
So all in and fitted and filed to shape, in and ready to go.  So stripped it all out, glued it all up and final fitted it.  Then read through the specs and found the input voltage area.  It said that 5.4v up should run it, so I opted to try it on a 5v powerbank as the first test, and it instantly started twinkling away, just one rear led not working, so sorted that and had a complete periscope all finished and wired up ready for triggering. :)  In some modes it doesn't draw enough current to keep the battery on, so it has to be pretty efficient. :)

It is already reshaped to fit the 300mm dome profile, so i should be ready to fit it as soon as JAG does his lifter run.  Just need to work on the LFS and custom sabre now and the results with the lifters should be quick and fun. :)


And a poor quality video of it in action. :)


Thursday 21 March 2013

2-3-2 Feet drive idea

I have been thinking a lot about a more usable and stable system for 2 leg mode.  It's top heavy and so pretty unstable at the moment, and I don't want to add anything to reduce the ride height.  The shoulder action and leg lift are fine, and I think when I get the leg rods shortened and the drive added it will be great as an action.  But a lot of the issues are caused by balance, because the foot print of the 2 wheels in 2 leg mode is only about 6" apart.

My 72mm centre wheels are fine, no problems with general use and even coped with bricks etc.  And if I have decided that driving on rough surfaces is out anyway due to the vibration  then why not go for 3" drive wheels too.  If separated as much as possible you could get maybe 9" or 10" between touch points.  Maybe more.  Almost doubling its foot size.  And how about 3 wheels in each foot?  It would also allow skate bushes above the drive trains to be fitted to better handle impacts.  That would help a load with 2 leg balance and the 2-3-2 itself.  But would limit the surface choices a little.  Decisions decisions.

But as a bonus, if the static is caused by the drive trains then when I redo them I can make sure there is no contact of plastic and metal. :)

Lets get the current 2-3-2 as good as possible, finish the rest and come back to this idea.  Maybe I could do a swappable drive setup that would allow bigger wheels only for 3 leg mode.

So this weekend I intend to shorten the rods by about 1.5mm, this should help align the body legs and feet at the centre point, meaning that the balance can be taken back far enough to leave the rods in compression before lifting the leg.  Then look at the leg lift stop points, and maybe retest the basic 2-3-2 action. :)

I have also been playing with my DD periscope, and the lighting kit.  Not a good fit, I need to totally redo the risers to allow the kit to fit.  Never easy. :)  But should be sweet if i can make it work :)

Tuesday 19 March 2013

NEC Weekend R2 experience

So after a lot of messing about i got the 2-3-2 working so i could use the trolley.  Didnt do more than make sure it roughly worked.  I was to regret that. :)  I loaded up and James and i went off to the NEC.  

Loading it in the car i bent the back door, so that needs to be stripped and rebuilt, i will add some sort of barrier to stop the door going into the body and so protect the trims.  Battle damage. :)

Few issues,  firstly I got there and had forgotten a fuse for the feet drives. :)  James had a spare so off we went.  Seemed fine at first, all the light triggers, mp3s and the dome servos were fine, CBI works well and triggers fine.  Even the dome position control worked fine.  The same static issues were there, tried a bit of wire from the hose to the ground, not sure it really helped.  Also tried GND on the battery to the frame, no joy there either.  Didn't try both together and neither were properly installed, might try them both again.  Needs more research.


The signal to the droid see seemed to be effected, it felt like the auto stop was kicking in, not all the time, and not a disaster but worth fixing, not sure if there was something else on a similar signal causing issues, but that should be easy to fix by extending the time out a little, it didn't last long, so a bigger delay might work fine.  Odd because it worked fine last time, it didn't miss any command calls, just occasionally stopped briefly, and the Sabertooth wasn't flashing any error lights, so I'm pretty sure it was signal.


About 2pm on the Sat James' controller ran flat.  So i drove mine to where i needed and unplugged the controller and he drove his round.  I didn't spot R2 slowly driving in circles, luckily in space.  I hadn't turned off the controller before removing the battery, lesson 1 learnt. ;)

Then just at the end of Sat the droid stopped responding and very slowly just drove on, I jumped in and killed the power, the 5v body battery was flat.  So I know what happens now. :)  It had had most of a week of testing and that day, I will have to remember to charge it before EVERY event. :)  I swapped the dome one into the body and met C3P0, an awesome Wookie and a Slave Leia. :D  But no dome lights or servo control for that. :(  So lesson 2 learnt. :)


So Saturday went well, the kids loved the R2s and we got a great response, James and Stuart's looked great and as a collection was a nice range of materials and methods all done well and all looking great. :)


The Sunday contained my biggest lesson.  I hadn't remembered the cheat sheet.  So I was looking for different sounds and dome door scripts and accidentally triggered the 2-3-2, he had 3 kids in front of him and I was sat behind the stall.  Luckily I realized what i'd done and sprinted to grab him, caught him just in time, he would have gone, and James retriggered the 2-3-2.  My heart was racing, as much from fear of crushing kids as breaking R2. :)  So lesson 3, move 2-3-2 command so it's almost impossible to find. :)  I so need to work on that 2-3-2, its a menace at the moment. :)

This was only minutes before it all went wrong:


After lunch on the Sunday I started having some odd little issues, the dome position commands wouldn't end.  Couldn't work it out.  Then about an hour or 2 later the droid just stopped dead.  It was the main battery.  So i went and got the trolley.  Tried the battery again, it gave just enough power for 2-3-2 and i popped him on the trolley ready for home. So I think the dome position control must be trying to move the last bit too slowly to move at really low battery levels so it doesn't managed to reset the master.  It still drives fine when that happens tho.

The 12v battey said it had 4/5 lights left when I unplugged it on Sat, so didn't charge it.  I think I need to let the battery settle for a bit to get a true reading.  But that battery had done quite a bit of servo and 2-3-2 testing before the event so it still did very well.  Will charge them all for the next 2 day event and should be able to do the whole thing no problems.  

But we got a great reaction and loads of photos taken.  Was a brilliant weekend.

Need to sort that static issue, its bugging me.

But Easter I will get the servo rods connected and get those doors and flapping, then work on the 2-3-2 again.


Thursday 14 March 2013

What a Nightmare :)

What a nightmare.  I have spent all week getting all the old stuff working again after the rewire.

First job was the dome drive on/off pad issue.  The effect was that when I turned the dome off t would also set it to slow mode and turn off the feet.  Also did some odd very odd stuff and stopped working at times.  So I checked EVERYTHING, reheated the joints on the shields, reprogrammed the Xbees and still nothing.  But swapping the pins in the code moved the problem, so the code was ok.  I was totally lost.  So after a load of retesting and rechecking I decided to try powering it via the USB, hey presto no more problem.  Very frustrating.  But sorted.

Then I got the MP3s working via the pad, no trouble there, then the dome position control worked straight off and I'm thinking I'm doing well.  I connected up the dome, and the Dome lights wouldn't trigger, and the dome servos just crept open.  So stripped the dome and tested the I2C pass through from the slip-ring and that was fine, but the 12v supply wasn't working.  Turned out the Anderson connector had slipped internally from the rigrunner, so it wasn't connected on the ground side.  Sorted that and I have dome servos and lights triggers again. :)

So with all the old stuff working again, i moved on to the CBI, that is now flashing away nicely, still need to chose the triggers for it, but they work on the 1-20 i have assigned as a temp solution. :)  But looks like i have a dead servo in there. :(

I managed to get my car looked at and it's safe to drive, so the NEC for Sat and Sun is looking possible now.  I also managed to take off Friday afternoon.  So I hope to get the 2-3-2 working again so I can use the trolley in 2 leg and still drive him in 3 leg. (will redo the code to add the feet drive in another time), and I want to get the CBI door working so I can show the battery level. :)  But I'm hoping to get my new laptop delivered tomorrow, so I may be able to do a little more work at the event too. :)

Overall a testing week, no punn intended.  But finally feel like I'm getting there. :)

Sunday 10 March 2013

USB Wiring

Slow progress this weekend.  Didn't get much done.  Needed a think as much as anything.  

I wanted to wire up all the USB stuff, but it wasn't as easy as it first appeared.
The 5v body battery needs to supply 4 Arduinos from the main output.  
The battery has an on but no off switch (no draw switches it off)
The bottom front input needs to charge the battery.
The 2nd output is fed to CBI door to act as 5v out for charging phone / pad etc.
Also the top front input needs to be fed to slip ring board to charge dome battery.

So I started by moving the battery to more easily access the on switch, and then made up a USB lead connected to a switch to allow the 5v to be turned off.  Connected the charge input and output leads and that was the battery end sorted.


I decided to power the Arduino's via the USB inputs, apart from the master that uses pins into the Vin and GND.  So I wired all the USB leads to a common point snipped the power input ones back, added 2 pin connectors and added a 2 rail power bus, 5 connection points, 1 in 4 out, all wrapped up with tape it looks pretty neat. :)  I used an LED USB lead to power the 2-3-2 controller, it should give a little light in the droid with the skins on. I also stripped the dome input lead and fed that up top to be finished off later. :)


So as usual I think I'm done, test it and find a dead lead to the master. But fixed now. :)  Just need to wire up a 12V supply from the Rigrunner to the DC/DC and I can start to get it all running again.

I also had a look at that pad issue.  I opened up the pad to find the the Xbee was barely connected, so decided that cant be helping. :)  Pushed it in firm and screwed it back up, I'm hoping that might have been the issue, but pointless debugging further till I can test if that helped.

So my week off made progress, but as always hidden jobs and underestimating the time needed slowed me down.  But skins are done, so that is a nice landmark.  Need to refocus now and try and get a driving droid for next weekend.  Should be doable, but would be nice to sort the centre vent mounts and at least get the Utility arms and CBI working. Will see how much energy i can muster. 


Wednesday 6 March 2013

Skins Completed

After a lot of cleaning and prep the skins are finally finished.  

First off I finished fitting the skinsnaps, removed them and used an entire tube of Superglue Powerflex gel over the 12.  Maybe wont need it, but can't hurt.

Then I used VHB on all available surface area, even on the door trims.  It feels great, no slip so far and all holding nicely.  Pretty easy but slow because of all the sanding, cleaning and degreasing.


I love these skinsnaps.  Now they are fitted to glued up skins they are so much easier to use and they do a great job. 

The 2 doors i had tried JBWeld on for the trims do have a little mess on them, but it wouldn't sand out, so i left it.  You have to look hard to find it.  The Sherrel skins fit perfectly, there is approx 1mm gap that can shift due to the snaps and the way I have them fitted, but good enough for this job. Just hope it all holds. :)


The rear door is held closed with 2 small magnets, may need to add more stick if it doesn't stay closed when driving.


You can see the added extra on this one too. :)  The CBI bay warning sticker. :)  Thanks James. :)

Id like to polish the side and pocket vent backs and refit the coin returns with better tape, but those jobs can wait. :)

So that's the skins done.  Need to do the servo rods and positions next so the doors stay closed.  The alignment looks ok, so fingers crossed the servos will be enough. 


Monday 4 March 2013

Skin work Part 1

The week of is going well.  I had James over on Sunday, and we got quite a bit done, he did some painting and we worked on the skins, mainly the rear door and the 2 front doors.  The rear door went in well, I did polish the silver panel and I'm glad I did, I may need to redo the final position of the trims to get it spot on, but once its all attached I think it will do well. :)  I still need to replace a few nuts on the door, there are a few that aren't nylocks.  The outers are just clipped on for this shot.


After the rear door, we cleaned up the 2 long doors and attached the trims.  The VHB made that job really easy.  :)  They are really quite firm.  I did have to redo one once the skins were on, but they came apart with a little coaxing, but enough of a struggle to reassure me.  Also repaired the problem CBI hinge and cured the wobble, also added something cool, but will wait for the finished shots for that. :P

Today i mounted the arm carrier using Superglue powerflex gel and 8 small countersunk screws, it should stay put :)  The arms need their final adjustments and tightening, so not perfect, but looking great.  I couldn't resist, i added the top layer for the carrier too. :)


Then i moved onto the skinsnaps, i decided to mount these so the the mount holes were aimed a little away from the centre, so as to guarantee the nuts didn't hit the frame.  The hardware that came with them is great, im hoping they dont work lose.  I might take the skins off, mare the positions, and then remove and super glue the snaps in place, then bolt over the top, might help reduce the stress on the alu around the bolts.  I added one side and released the clamps at the top and it just stayed put.  So I did the other side and released all the straps and it is rock solid. and fits like a glove.   Lets hope it pops off without too much of a struggle.


Saturday 2 March 2013

Prep and Polish

It's official, I hate polishing. :(  Its great when you get to the end, but man is it a slog.  I reverted to using a needle file followed by 2 grades of scotchbrite pads and then polish.  The top arm is a little stripy but I cant face any more. :)  So LDP, Arms and centre vents and surround all ready to go.


Next step is to strip out the rear door, polish up the silver panel and then glue up the rear door. Getting towards the good stuff now. :)