Friday 14 October 2016

R2-2E Finished Dome

The render is a big help, but it needed life.  And i had imagined a few of the details differently.  I polished the HP cowls, and painted the silver door, as well as colouring the rear PSI panel.

I spent a long time choosing the paint, and im really happy with the contrast.  Should be a very bold droid. :)

After painting all the panels and the dome stripe, i finished assembly using 3m 9088 double sided tape.  That stuff is a joy to use, and i should be able to strip the dome if i ever need to.


BHD Carbon Hydro Hinges Mk1

I had been pondering an uber hinge for some time.  I loved X2's hinges, they have been brilliant, and i knew i could improve on them for Juice.  I wanted to make sure of the following things:
1.  Easy Mounting
2.  No play in the hinge pivot
3.  No play in the connection to servo
4.  Cannot hit the outer dome when fully open
5.  Uses full range of the servo
6.  Sits perfectly when closed
7.  All 9 will fit in a dome

So i started playing with hardware.  Eventually i found my setup for the pivot.  2 flange bearings press into a dome base, and an Axle bolt attaches the arms, offset by 1mm spacer washers.

A plate is added on top of the dome base and is bolted to the dome.  The servo is attached to the plate using high density 1mm double sided tape.  The connection from servo to hinge is done using an arm extension and plastic ball ends with ali standoffs all connected using grub screws.

Aluminium standoffs support the structure, and then the arms of the hinges screw to a foot that is simply attached to the outer door using 3M 9088 tape.

With all the hardware working, i then turned to Cubify to model it.  The servos have approx 110 degrees of range.  I did a few test CNC layered bases to make sure it all worked, then added the dome curves and it was ready for the final version.


Then to Shapeways to print them.


This is the final prototype before receiving the carbon.


Next up was the mounting.  The hinges need a small offset from the opening, i chose 1.5mm, and made a jig, to allow me to mark the centre, clamp the jig in place and drill the holes. :D  Easy.  I did all 9 holes, and countersunk them for M3 bolts in less than 90mins. :D     


(This step wasn't needed, but i couldn't resist and i didn't have the carbon)

Felix sorted the carbon cutting, and i spent a few hrs cleaning them up.  But they turned out great.


The installed hinges are brilliant, like no other R2 hinge ive played with.  So smooth and solid.  And the Savox servos i chose are FAST!!!!  The pics below show the dome finished.  I will update that in another post.


I will try and get the sketches sorted and get it flapping from X2's master, once im happy i will either share or run them in some form.  


Dome Connector

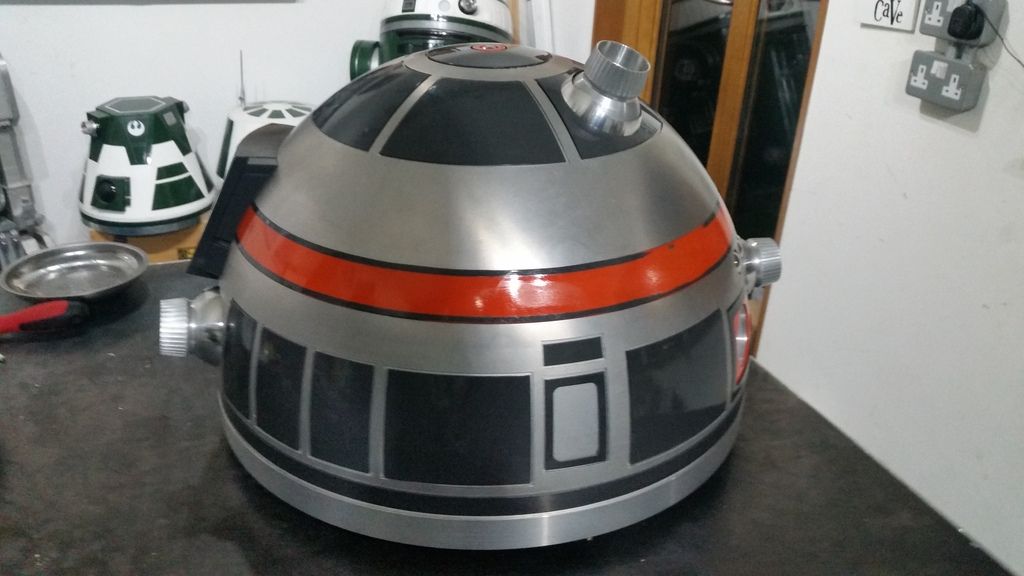
I needed a way of retaining the dome, but allowing easy removal.  For both BHD and X2 i managed to get the dome electronics to connect with the removal of the dome.  I hated fishing for wires and connecting after docking.  So Juice needed similar.

I am using a 12 channel slip ring this time.  Just for 12v (5 lines), Gnd (5 lines) and I2C pair.  So 15pin connectors would be fine.  In addition X2 used magnets to retain the dome and steel studs to align it.  And i hoped to do the same for Juice.

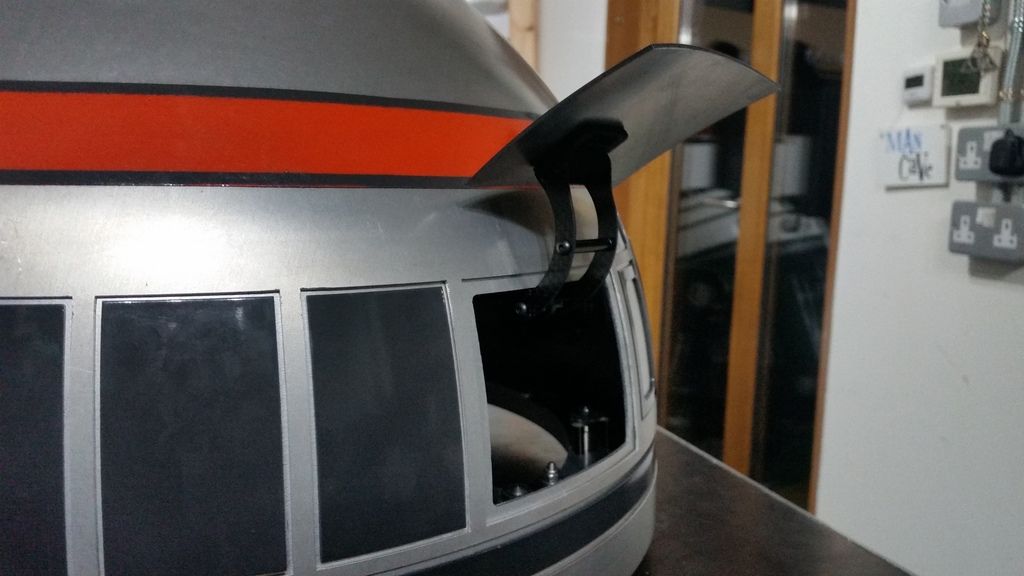
So i removed a section of the dome base ring, to allow the connector to be close to the rockler, and mounted a bracket to hold the dome end connector.  Then an arm to the inner rockler to house the droid end connector and support the wire and any additional connectors from the slip ring.

James made me some beautiful steel studs to mount to the rockler.  These were 13mm diameter, and M5 thread in the bottom, 5 of 13.3mm and 1 of 23.3mm.  The holes in the dome base were opened to 14mm, and magnets were suspended on carbon plates using more ali standoffs of 15mm and 25mm.

(early version of arm and studs)

(Finished version)

The dome lifts off really nicely and the dome is aligned by the pegs, so the connector clicks on beautifully. :)  I may redo one of the pegs, so there are 2 long ones, just to be extra safe.

This still leaves the bottom of the rockler available for the dome drive gear. :D

HP Mechs & BHD Shelf

These are based on the concepts i used on X2 and BHD.  A a very simple mech, just up and down, and cant be twisted.  But this time i wanted to make it a little more of a complete part.

I ended up with a plate that mounts to 4 25mm M3 5mm diameter standoffs and has a slot on the back and a spot for the servo. :)  The 2 steel M4 standoffs connect to a CNC bent bracket that connects to the ballend, it also has holes for a cable tie to retain the LED lead.  It uses the full 90 degrees of the servo and should do the job just fine. :D

I added 4 little pads of felt to the back of the rear cowl, this takes out the slop and stops them from making too much noise.


With that done, i moved on to do the electronics (putting off the hinges).  I eventually decided to follow a similar path for this.  I simply used more standoffs and mounted a 2nd level to the rear logics.  Then to home the servo board i added a daughter board that is connected by 2 bent 2mm ali brackets, this position will keep all the wires close to the dome and should help keep it neat.

The plates are all now 2mm carbon fibre.  This is the final assembly:


R2-2E Starts Here

Having decided on #3, I had to come up with a plan for a scheme.  I haven't done R2-D2 and keep thinking i should.  But it is just so BORING!  So after a lot of browsing and looking at all the cannon astromechs, i decided there was room for a few more, and that i would do my own.

I chose the black and orange X-Wing from TFA as my inspiration, and did a very lose colouring in job.  Then the CG legend that is Paul J Wiz Johnson worked his magic and this is what he will look like.


He quickly got referred to as 'Juice' and i think that name will stick.  But R2-2E is the chosen name.

I am amazed at the difference in the club.  It only took a few weeks to get EVERYTHING for a dome.  Brilliant. :)  So with all the bits in hand i couldn't resist starting. :)


I attacked the base assembly in the following order.
1.  Removed panels and prepped both layers of the dome.
2.  Clamped the domes together to get best alignment and fitted the front and rear HP to lock the dome.
3.  Fit Radar Eye.
4.  Clamp in HP pie then fit top HP.
5.  Fit logics, moving slightly to make the outer spacing of the panels work.
6.  Fit ia-parts.com PSI holders, again aligning the outer panels.
7.  Fit Dome Bumps.

I soon got to a point where i could do little more without some bits.  For this droid, im aiming to only buy cosmetic parts via runs, and to make the rest myself, always looking at things fresh, and taking what ive seen and learnt into account.  Also im fed up with cheap servos, i hope that by using Savox servos will make him last a lot longer. (Although, 4 years of Twitching on BHD with 4 fails from 17 servos and all recent, isnt too bad really.)


I needed to design the following parts:
1.  HP Mechs - Single axis anti twist.
2.  Hinges - Fit to the dome, using a lot of the concepts used on X2.
3.  Electronics mount.
4.  Slip ring connector / Electronics docking.
5.  Dome fastening of some kind.  Studs, or similar to keep the dome on.