Time has come for me to Fish or cut bait. I have been wanting to write up the BHD control set-up and allow others to use it too. But i have decided to delay it, and give it another few events testing, add the safety relays and make sure it is totally safe. But also add the DBC, Magic Panel, Data Panel (for those that want it, im not fitting one in mine), and also make a start on the Touch Screen controller for in the droid and get Mk2 PS2 Pad complete and maybe using custom PCBs for the shields and pad. :) It will be much easier to support something that is pre-made rather than users making their own shields. Most of my set up issues (and James') were wiring related, and this would eliminate a lot of that. I may be able to get the new Twist Paw arms in and working, maybe add an X axis for the HPs, and maybe a few other gadgets before it goes live too. :)
So now refocused, i am tracking my Magic Panel as it is shipped from the US, hope to finish the DBC this weekend, shouldn't be long till i have the Data Panel and that will be an easy job to add and code up. I will start all 4 relays this weekend (2 for the feet and 2 for the DC converters that power the servos). So in a few weeks time i will be ready to start on my touch screen. But should have an all singing all dancing R2 for the upcoming events. :)
The plan for the touch screen is to have a touch LCD screen (ideally 5") fitted in portrait behind the big door on the front, so instead of having the Data Panel, i will have my touch screen. Id like to be able to do almost anything i can do on the pad via the screen, this may mean a menu system, but should be fun to do. I need this screen to send the scripts to the master via I2C, currently the Uno i use as the master is using all 20 pins, so I2C is the only option left. :) So i hope that the Screen will talk to the master using 2 way, and the master will talk to the end units, need to get the screen and start playing. :) This one should be a really nice addition and make the BHD system not just a very functional system, but a cool one too. :)
I need a free graphics app to create the images i will use on the LCD, does anyone have any recommendations?

Thursday, 29 August 2013

Saturday, 24 August 2013
Dome Bump Controller - Part 2
So i got the code working, but soon discovered lots of tweaks to make it more usable. this is a list of what i added and changed.
1. Removed flash after button change to make lights more responsive and not turn off.
2. Added PSI Confirm Flash pattern to more easily see when activated.
3. Refined all the Get Out commands to reset more easily if wrong code added. Any bad combo, or too short or long will error it out. These only apply depending on conditions to allow it to be played without activating.
4. Added PSI Get Out Flash to see when it crashes out (it looks like an X on the PSI, may tweak this when diffused to more easily see the shape).
5. Added de-bouncing to the 2nd confirm to make it easier to trigger.
6. Added a boot up combo to see if it reboots more easily.
7. Added the combo entered in the end confirmation flash. :)
8. Changed all the delays to take out flashes during get out and make it more sensitive but still usable, it now times out in 1s, so it has to be done as a combo, and all the flashes are much shorter to make it quicker to use, but still recognizable.
So the steps to use it successfully are:
1. Hold both until flashing starts (1.5s).
2. Release buttons during flash.
3. Button A or Button B until Flash (0.5s).
4. Release button during Flash.
5. Repeat 3 and 4 for the Same button, only one button should be use and from 1 to 3 times.
6. Hold both buttons until flash starts (1s, then combos are sent on signal lines).
7. Release buttons during flash.
8. Flash pattern will confirm the code received.
Resulting in 6 combos, A, 2A, 3A, B, 2B, 3B, or 1-6. :) These output on 3 signal lines to the master.
The BHD I2C stuff is in, i just need to do the spreadsheet of the scripts that use the rear PSI, then do the timings and the scripts themselves, but all easy to do, just a case of getting on with it. Once that is all done and in tune with the main setup, i then need to add the reading of the signal lines to the master, then i will be able to upload the code to the DBC and see it working in the dome. :)
Im really pleased with it, from where it started this morning (i had thought it was almost done) it has come a long way, it is really usable but you need to know what to do, so its spot on. I havent had any bad signals, and i love that it confirms what it read. :)
Here's a vis of it so far:
1. Removed flash after button change to make lights more responsive and not turn off.
2. Added PSI Confirm Flash pattern to more easily see when activated.
3. Refined all the Get Out commands to reset more easily if wrong code added. Any bad combo, or too short or long will error it out. These only apply depending on conditions to allow it to be played without activating.
4. Added PSI Get Out Flash to see when it crashes out (it looks like an X on the PSI, may tweak this when diffused to more easily see the shape).
5. Added de-bouncing to the 2nd confirm to make it easier to trigger.
6. Added a boot up combo to see if it reboots more easily.
7. Added the combo entered in the end confirmation flash. :)
8. Changed all the delays to take out flashes during get out and make it more sensitive but still usable, it now times out in 1s, so it has to be done as a combo, and all the flashes are much shorter to make it quicker to use, but still recognizable.
So the steps to use it successfully are:
1. Hold both until flashing starts (1.5s).
2. Release buttons during flash.
3. Button A or Button B until Flash (0.5s).
4. Release button during Flash.
5. Repeat 3 and 4 for the Same button, only one button should be use and from 1 to 3 times.
6. Hold both buttons until flash starts (1s, then combos are sent on signal lines).
7. Release buttons during flash.
8. Flash pattern will confirm the code received.
Resulting in 6 combos, A, 2A, 3A, B, 2B, 3B, or 1-6. :) These output on 3 signal lines to the master.
The BHD I2C stuff is in, i just need to do the spreadsheet of the scripts that use the rear PSI, then do the timings and the scripts themselves, but all easy to do, just a case of getting on with it. Once that is all done and in tune with the main setup, i then need to add the reading of the signal lines to the master, then i will be able to upload the code to the DBC and see it working in the dome. :)
Im really pleased with it, from where it started this morning (i had thought it was almost done) it has come a long way, it is really usable but you need to know what to do, so its spot on. I havent had any bad signals, and i love that it confirms what it read. :)
Here's a vis of it so far:
Monday, 19 August 2013
Dome Bump Controller - Part 1
The DBC arrived the other day. It is a pretty piece. I followed the PDF and soldered it up. Then went to look at fitting it. The dome has 2 bigger holes so that the buttons sit under the outer layer, this was perfect for the DBC, and didnt need any work at all. But i had no way to add screws, and didnt want to add the the steampunk look by bolting through both layers. But the fit on the dome is so nice. So much so that i just cleaned the dome and the housing and used superglue powerflex to stick it in place. Its not perfectly square, but the buttons seem to work fine, so good enough, and it's not coming out without a fight, and if it does i can straighten it next time. :)
So with it fitted i needed to decide how to use it. The default code controls the rear PSI and outputs different signal lines depending on the combo used. But i need the rear PSI able to be triggered to run the same as the front PSI during things like the Cantina and Leia message, so it needed to be able to receive I2C commands. So after a lot of bad ideas i went for a simple setup that will work with my current setup, but that wont be required, so can be left out. This is the plan:
I2C triggers using the same as the teeces, run the rear PSI options, e.g. flash one colour
Rear PSI will flash in the default way while inactive, so std sweep unless set by the user in code or by pad.
Buttons will flash the rear PSI when pressed, so A is one colour, B is the other and Both is all LEDs on
The code will look out for the following:
If both held for 1.5s then flash the Rear PSI in a pattern, then either press A for .5s up to 3 times, or B up to 3 times. The corresponding colour will flash for each press registered.
Then press both again for 1.5s (any alternate combos or held far too long etc will reset combo seek)
Rear PSI will flash a fattern
Using 3 output lines signal out the chosen on the 6 options e.g. for 1 use B001 for 6 use B110
The signal will go high on all three lines to signal a new command is due, then it will set the output lines for long enough to be read.
This gives the option for change and growth, by adding more lines and combos if needed.
So far i have the following planned for the options:
1 x A = Random Sounds On/Off
2 x A = Random Delay Long/Short
3 x A = High Low Volume
1 x B = Random Dome Motion On/Off
2 x B = Feet Drives On/Off
3 x B = 2-3-2 ? Maybe add extra combo for this one to make sure
So i made a start this weekend, but working with 2 buttons was more of a pain than i expected. :) I didnt work hard on it, just popped in and out, maybe why it wasn't happening. But i got there. I have coded all the button combo stuff and PSI default running stuff in, added the I2C base, i just need to add in the Teeces script alternatives and get the timing right on those. :) Im pleased with it so far, it should be easy to use but not easy to accidentally trigger. :) Just needs testing to death now. :)
I have a test setup with 2 buttons, and a rear PSI, then 3 LEDs setup as the output pins and will test the code on that Uno. Then i will need to update the master to read those pins, assuming i have enough spare. :) Then get all the timings right for the teeces scripts and then once all that is done i will upload to the DBC. All this fuss for 2 buttons and 6 options, i must be mad. But that DBC is too tarty to leave out. :)
So with it fitted i needed to decide how to use it. The default code controls the rear PSI and outputs different signal lines depending on the combo used. But i need the rear PSI able to be triggered to run the same as the front PSI during things like the Cantina and Leia message, so it needed to be able to receive I2C commands. So after a lot of bad ideas i went for a simple setup that will work with my current setup, but that wont be required, so can be left out. This is the plan:
I2C triggers using the same as the teeces, run the rear PSI options, e.g. flash one colour
Rear PSI will flash in the default way while inactive, so std sweep unless set by the user in code or by pad.
Buttons will flash the rear PSI when pressed, so A is one colour, B is the other and Both is all LEDs on
The code will look out for the following:
If both held for 1.5s then flash the Rear PSI in a pattern, then either press A for .5s up to 3 times, or B up to 3 times. The corresponding colour will flash for each press registered.
Then press both again for 1.5s (any alternate combos or held far too long etc will reset combo seek)
Rear PSI will flash a fattern
Using 3 output lines signal out the chosen on the 6 options e.g. for 1 use B001 for 6 use B110
The signal will go high on all three lines to signal a new command is due, then it will set the output lines for long enough to be read.
This gives the option for change and growth, by adding more lines and combos if needed.
So far i have the following planned for the options:
1 x A = Random Sounds On/Off
2 x A = Random Delay Long/Short
3 x A = High Low Volume
1 x B = Random Dome Motion On/Off
2 x B = Feet Drives On/Off
3 x B = 2-3-2 ? Maybe add extra combo for this one to make sure
So i made a start this weekend, but working with 2 buttons was more of a pain than i expected. :) I didnt work hard on it, just popped in and out, maybe why it wasn't happening. But i got there. I have coded all the button combo stuff and PSI default running stuff in, added the I2C base, i just need to add in the Teeces script alternatives and get the timing right on those. :) Im pleased with it so far, it should be easy to use but not easy to accidentally trigger. :) Just needs testing to death now. :)
I have a test setup with 2 buttons, and a rear PSI, then 3 LEDs setup as the output pins and will test the code on that Uno. Then i will need to update the master to read those pins, assuming i have enough spare. :) Then get all the timings right for the teeces scripts and then once all that is done i will upload to the DBC. All this fuss for 2 buttons and 6 options, i must be mad. But that DBC is too tarty to leave out. :)
Thursday, 1 August 2013
CE2 - Essen Germany
CE2
What a great weekend, where to begin? Lots of cool moments, but i will remember the event because of the other builders and their droids. A wonderful bunch of people. I felt very relaxed and in good company at all times. :) And the droids were great, lots of cool stuff on the way. :) At least 5 2-3-2 systems on the go, all using slightly different methods. And lots of plans to advance things, it has worn me out. But after a recharge I will just have to keep pushing on too. :) Good luck everyone, i look forward to reading your progress. :) The other thing is the kids, they do love R2, in the droid play pen on the stand they would lean in and stroke him, it was like being a zoo animal, but they loved the droids, i spent quite a bit of time driving in there.
Thanks to Arnd and Bernd and all the German guys, they did a superb hosting job. The stand was great and lots of variation for the public to see.
But also thanks to the UK guys, all superstars, a great week, with great friends. Some fine work all week long. So many fun moments and about 3 million Star Wars references along the way.
R2: A few lessons from this weekend. The 30Ah 5v packs i bought seem to last less time than the 12Ah ones i have, so may need to try some others. The packs also were only lodged in and so on 3 occasions i hit a bump while driving and the battery hit the power switch, not good, he just retains the last signal. One builder's leg at low speed (sorry Michel) once while dancing in a spin. And once while reversing. All luckily with no damage or major trouble. So i then taped the batteries to the main battery and it was fine for the rest of the event. I have a plan to totally avoid this issue, will do that next.
R2's drive was a problem this weekend. It started on the Thursday, in the press conference the drive started rubbing and he was ripping through power. But with a bit of WD40 we struggled on. Then disaster, R2 stopped driving on 1 side. So i got the legs off and found that the keyway stock was missing from the drive cog on one foot. So long story short, by locking one of the grub screws into the keyway i managed to lock it, and it lasted the event. But while off i saw how badly the wheels were rubbing, so went hunting for 4 screws and a drill. Felix had the drill, Bernd had the drill bits, and Heiko had the screws, i popped a pilot through the wheel hub into the derlin hub to lock it, worked perfectly. Big thanks guys. Couldnt have carried on like that :)
After that the battery lasted really well, so by the end of the event i was starting to trust him again. Little bugger. He has been pretty good recently, but every issue makes for a safer droid. So id rather find an issue i can solve with no damage than have a good event and still have a hidden issue.
So i didnt drive him about as much as usual, but still had fun with him, the pen was a great idea. :)
Here are a few photos i borrowed:


What a great weekend, where to begin? Lots of cool moments, but i will remember the event because of the other builders and their droids. A wonderful bunch of people. I felt very relaxed and in good company at all times. :) And the droids were great, lots of cool stuff on the way. :) At least 5 2-3-2 systems on the go, all using slightly different methods. And lots of plans to advance things, it has worn me out. But after a recharge I will just have to keep pushing on too. :) Good luck everyone, i look forward to reading your progress. :) The other thing is the kids, they do love R2, in the droid play pen on the stand they would lean in and stroke him, it was like being a zoo animal, but they loved the droids, i spent quite a bit of time driving in there.
Thanks to Arnd and Bernd and all the German guys, they did a superb hosting job. The stand was great and lots of variation for the public to see.
But also thanks to the UK guys, all superstars, a great week, with great friends. Some fine work all week long. So many fun moments and about 3 million Star Wars references along the way.
R2: A few lessons from this weekend. The 30Ah 5v packs i bought seem to last less time than the 12Ah ones i have, so may need to try some others. The packs also were only lodged in and so on 3 occasions i hit a bump while driving and the battery hit the power switch, not good, he just retains the last signal. One builder's leg at low speed (sorry Michel) once while dancing in a spin. And once while reversing. All luckily with no damage or major trouble. So i then taped the batteries to the main battery and it was fine for the rest of the event. I have a plan to totally avoid this issue, will do that next.
R2's drive was a problem this weekend. It started on the Thursday, in the press conference the drive started rubbing and he was ripping through power. But with a bit of WD40 we struggled on. Then disaster, R2 stopped driving on 1 side. So i got the legs off and found that the keyway stock was missing from the drive cog on one foot. So long story short, by locking one of the grub screws into the keyway i managed to lock it, and it lasted the event. But while off i saw how badly the wheels were rubbing, so went hunting for 4 screws and a drill. Felix had the drill, Bernd had the drill bits, and Heiko had the screws, i popped a pilot through the wheel hub into the derlin hub to lock it, worked perfectly. Big thanks guys. Couldnt have carried on like that :)
After that the battery lasted really well, so by the end of the event i was starting to trust him again. Little bugger. He has been pretty good recently, but every issue makes for a safer droid. So id rather find an issue i can solve with no damage than have a good event and still have a hidden issue.
So i didnt drive him about as much as usual, but still had fun with him, the pen was a great idea. :)
Here are a few photos i borrowed:
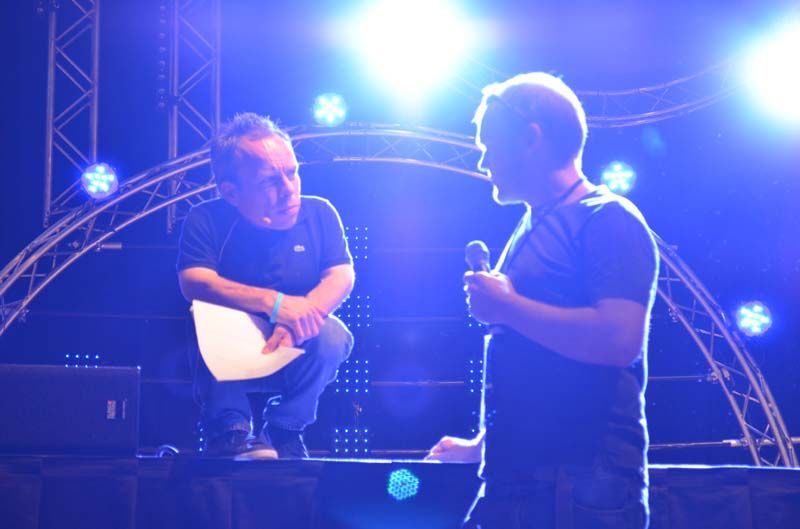
Me getting interviewed by Warwick Davis ;)
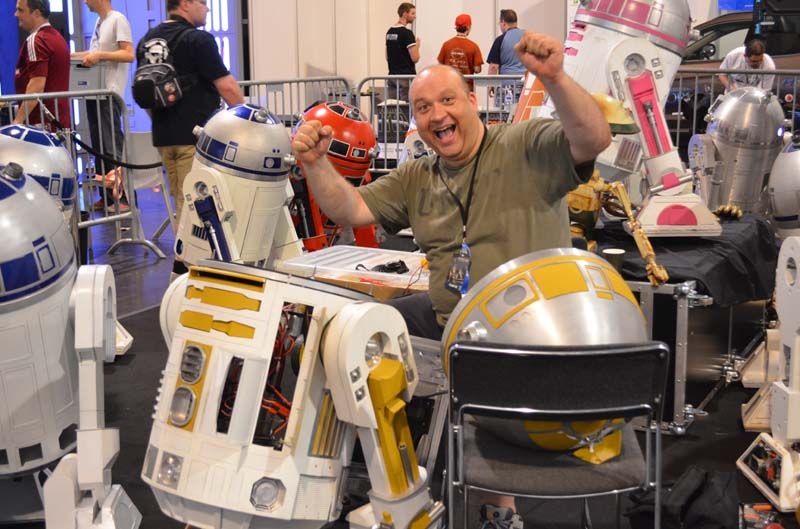
Flip, happy abut something.
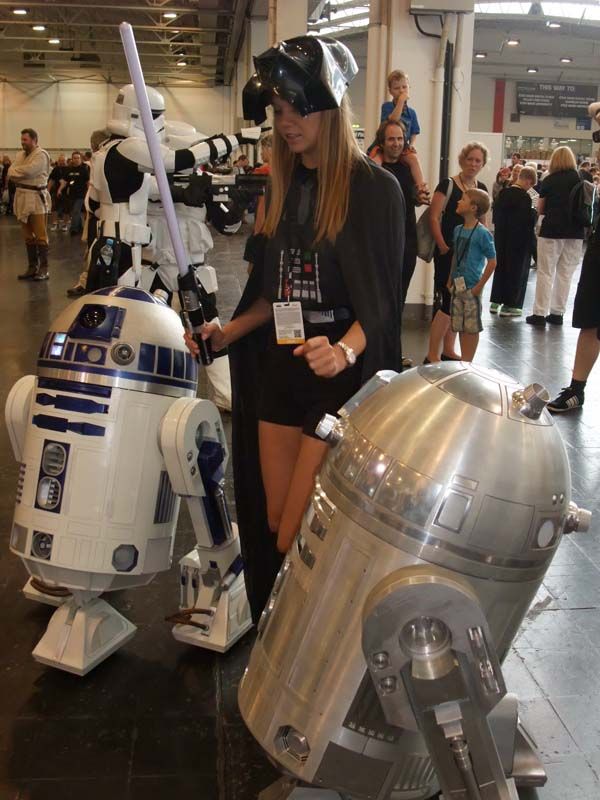
Russian TV girl, she was dancing with R2 and shook his hand. :)
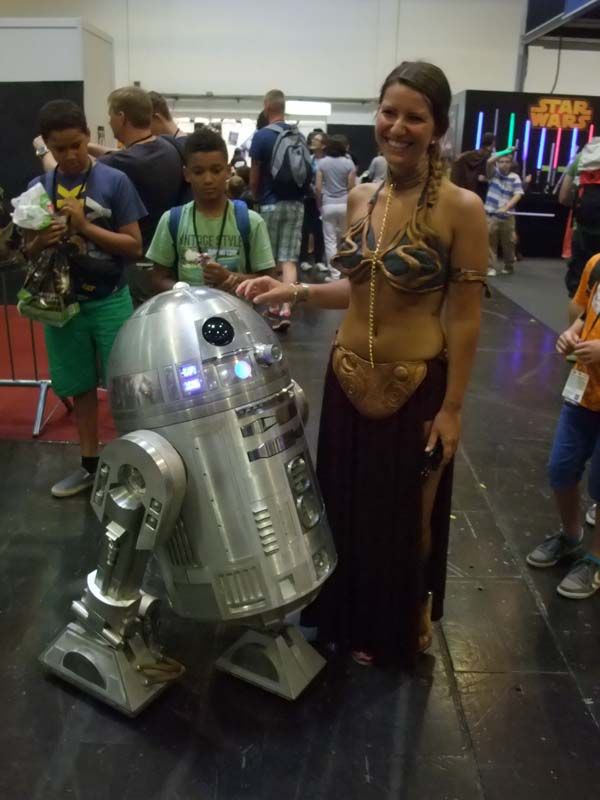
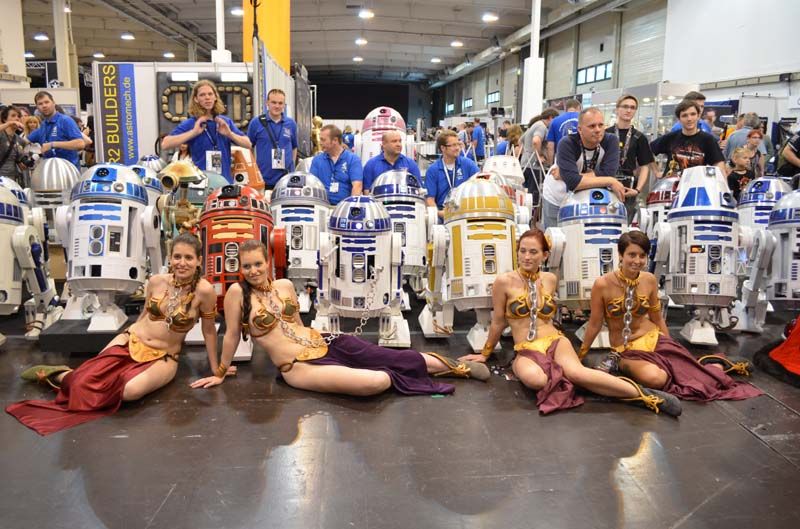
Slave Leia :D
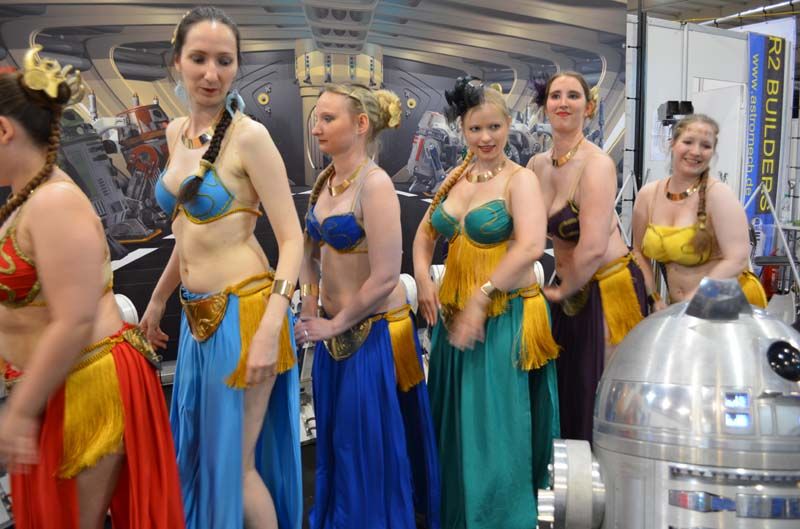
R2 leading a troop of 6 dancing Canteena girls. :D Good work R2.
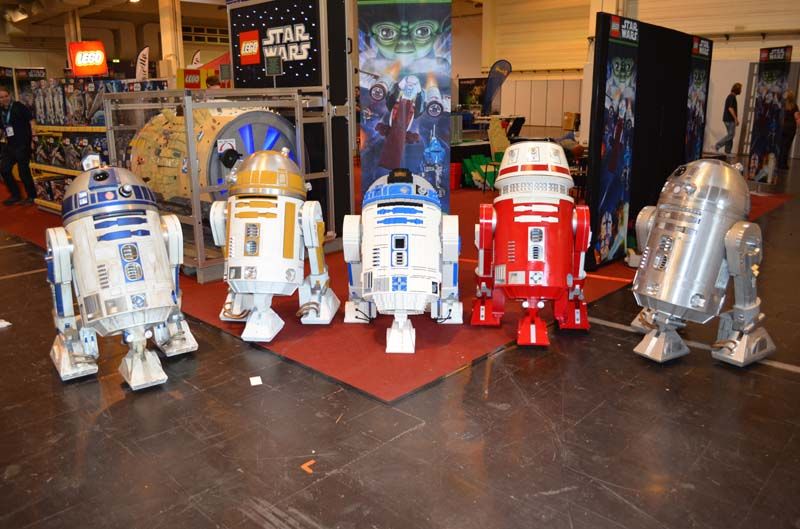
4 UKs with the Lego R2

Anthony Daniels and the Droids. :)
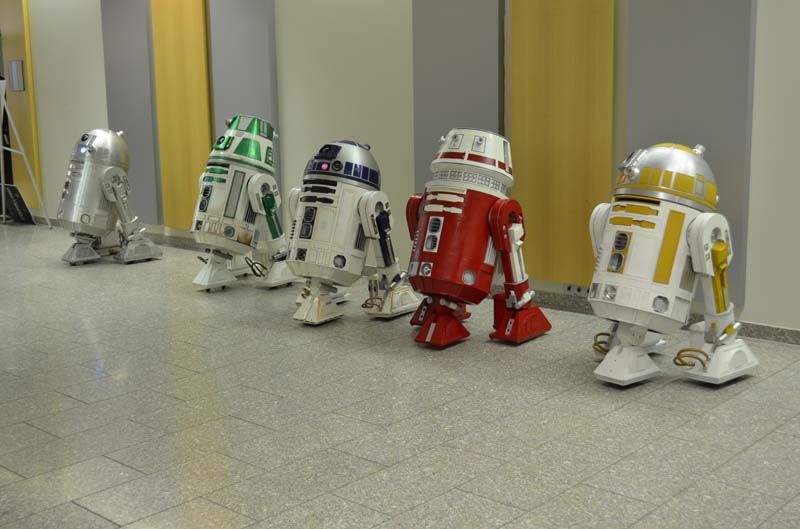
The press conference waiting area droid line up. :)
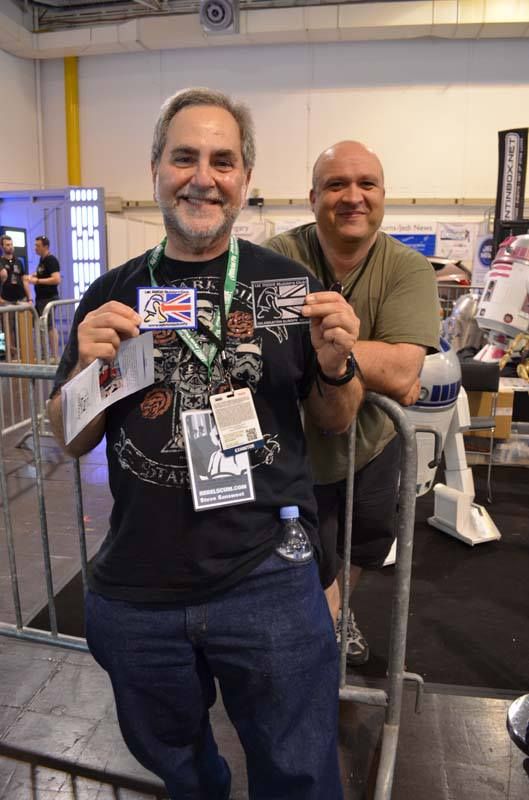
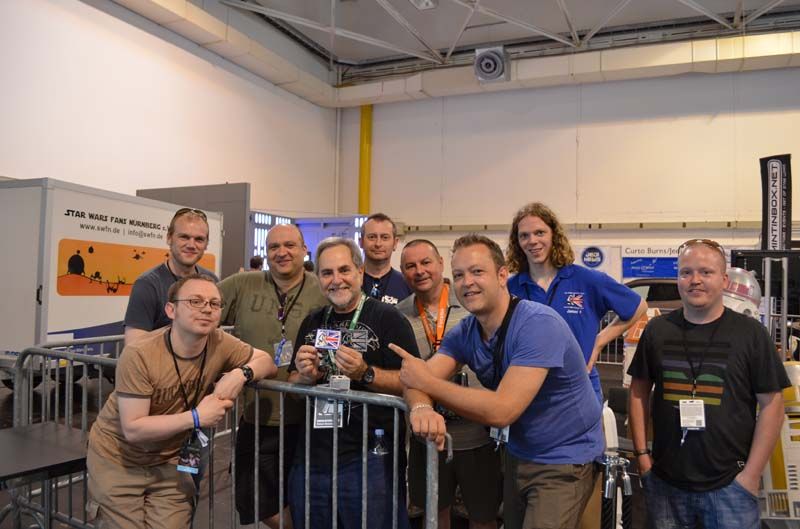
Steve Sansweet with UK builders patches. :) And the UK group. :D
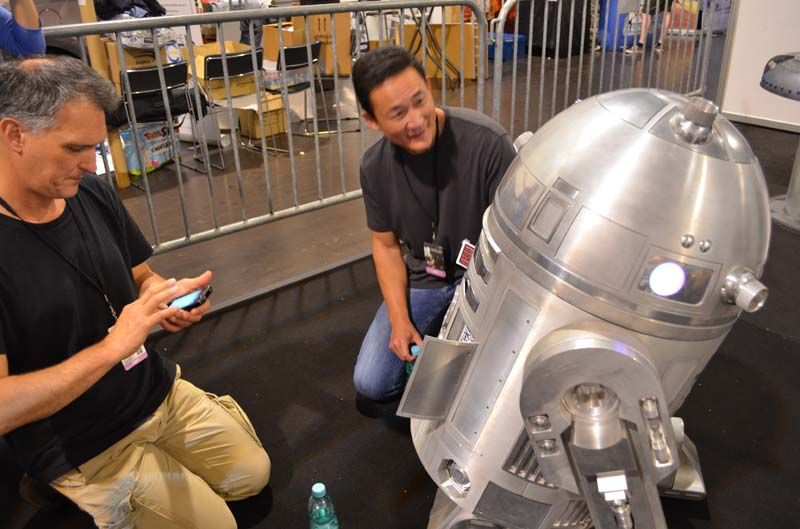
Clone Wars designers filming my droid. :D

Kenny Backer, UK R2 Senator, proud moment for the UK guys. :)
I have so far found 40+ vids of the EU Droids at CE2, and will continue to like all the vids i find on my YouTube channel: http://www.youtube.com/user/I8U2Astromech/
Dont forget to subscribe while you are there. :) I will keep liking all the vids i find. :)
Saturday, 20 July 2013
CE2 Awaits
I looked at the trolley today. The rear door was getting bent every time i used it, so it needed addressing. I added a board the same height as R2 to the trolley to give a flat surface for the frame rings to rest on, then removed the area of the mat that was pressing on the rear door. It works well, he now rests on the trolley without damage. :)

I then decided that the way i was strapping him to the trolley was also not ideal, it too was putting pressure on the skins and bending them. So i found that if i strapped round the leg to body hubs i could strap him on really tight without that problem.
So all safe and strapped to the trolley but no protection. So i got my over sized sleeping bag out and started playing. By making 4 small holes in the right spots, to pass the strap through, the bag can be used on the trolley and he is still just as secure. Really happy, hopefully he will make it to Germany in 1 piece now. :)
So with that done, i moved on to repair the back door. I removed all the bent bits and flattened them out and reattached them with VHB, and added tape to the back as extra support. Job done. :)

Then a few final little bits. I fine tuned the utility arms, and tightened a few bits and put the skins back on. And taped up a few unfinished bits. He is looking fine. :) I might swap out one for the front logics tomorrow (it has a dead LED).
While playing i spotted another issue with the 2-3-2, the leg rod fixings on the feet have play in them, not sure if that is due to the grass driving or if it has always been like that, but it will need redoing when i redo the ankle joints. I am confident that that will help quite a bit, and mean that the drive moves the droid and not the angle of the foot first. :) 2-3-2 is an almost never ending pursuit, fun, but not for the easily scared, we will get there eventually. :) But for the moment, 2-3-2 and 3 leg driving are fine, its just the 2 leg driving that will benefit. :)
Ian dropped off his droid today. James is over Monday. We collect the Van Tuesday, then fit the false floor to maximise the space. Then Flips for Tuesday night, via a few droids. Then its the 8am Ferry and the trip to Essen. Cant wait. :D

I then decided that the way i was strapping him to the trolley was also not ideal, it too was putting pressure on the skins and bending them. So i found that if i strapped round the leg to body hubs i could strap him on really tight without that problem.
So all safe and strapped to the trolley but no protection. So i got my over sized sleeping bag out and started playing. By making 4 small holes in the right spots, to pass the strap through, the bag can be used on the trolley and he is still just as secure. Really happy, hopefully he will make it to Germany in 1 piece now. :)
So with that done, i moved on to repair the back door. I removed all the bent bits and flattened them out and reattached them with VHB, and added tape to the back as extra support. Job done. :)
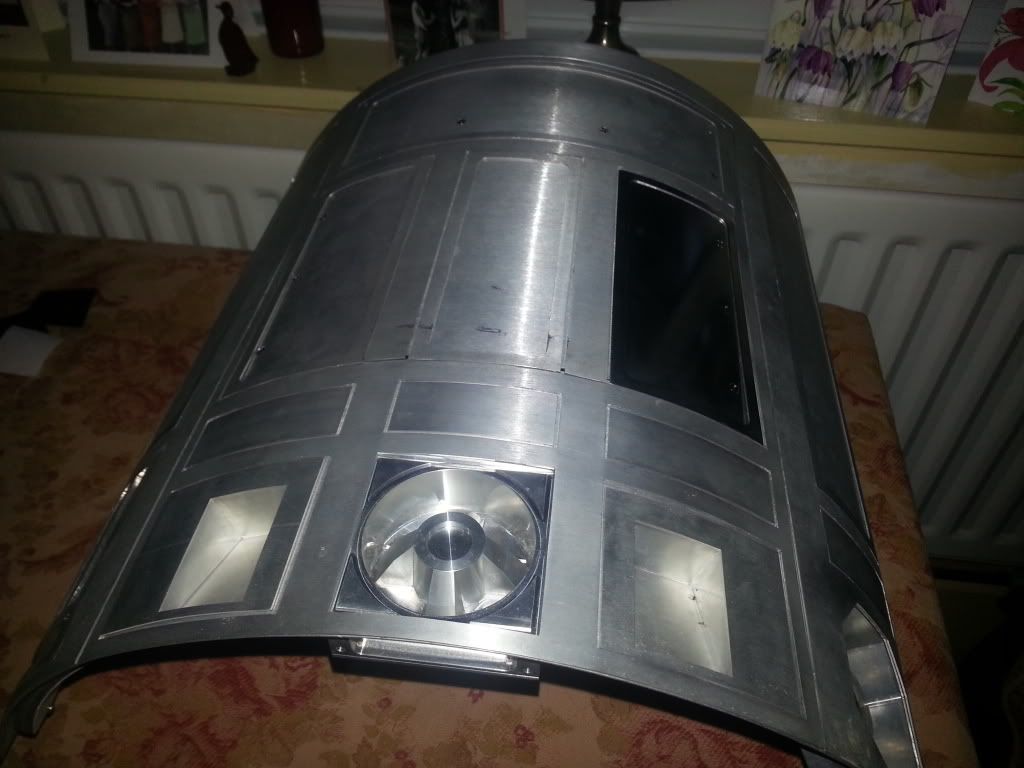
Then a few final little bits. I fine tuned the utility arms, and tightened a few bits and put the skins back on. And taped up a few unfinished bits. He is looking fine. :) I might swap out one for the front logics tomorrow (it has a dead LED).
While playing i spotted another issue with the 2-3-2, the leg rod fixings on the feet have play in them, not sure if that is due to the grass driving or if it has always been like that, but it will need redoing when i redo the ankle joints. I am confident that that will help quite a bit, and mean that the drive moves the droid and not the angle of the foot first. :) 2-3-2 is an almost never ending pursuit, fun, but not for the easily scared, we will get there eventually. :) But for the moment, 2-3-2 and 3 leg driving are fine, its just the 2 leg driving that will benefit. :)
Ian dropped off his droid today. James is over Monday. We collect the Van Tuesday, then fit the false floor to maximise the space. Then Flips for Tuesday night, via a few droids. Then its the 8am Ferry and the trip to Essen. Cant wait. :D
BHD Control code now Online
James has now had the code uploaded to his droid too, we tested the booleans for the 2-3-2 and dome potentiometer. All works well.
We did need to adjust the stop points for the dome and feet drives and also the speed and turn profiles for the different modes, but easy fixes. The code is now reordered and annotated to make those changes easier for others.
I went through all the sketches and added a header, and a few critical annotations. It can still be improved, but its all in there now, all tested and all working reliably.
Im not 100% happy that the random dome motion prevents the triggering while moving, but it was intended more as a static mode, so its fine for now. Also the flash of the HPs means that the dome servo scripts can be up to 0.15s slower to trigger, but no biggie.
So all MP3s, all sketches, libraries and Xbee files are now uploaded to my drive. Please test them thoroughly before using in public. Mine has a lot of run time now, and i have fixed lots of issues, the code is good, but id hate to see any droid go wild. This code is used at your own risk, but i haven't had any issues and trust it. Good luck.
NOW OUT OF DATE
I will write up the wiring of the setup after CE2 and pad 2 are done.
Im so glad i upgraded it to the 193 commands, it gave me the chance to refine a lot of the functions. Really pleased with the results. :)
We did need to adjust the stop points for the dome and feet drives and also the speed and turn profiles for the different modes, but easy fixes. The code is now reordered and annotated to make those changes easier for others.
I went through all the sketches and added a header, and a few critical annotations. It can still be improved, but its all in there now, all tested and all working reliably.
Im not 100% happy that the random dome motion prevents the triggering while moving, but it was intended more as a static mode, so its fine for now. Also the flash of the HPs means that the dome servo scripts can be up to 0.15s slower to trigger, but no biggie.
So all MP3s, all sketches, libraries and Xbee files are now uploaded to my drive. Please test them thoroughly before using in public. Mine has a lot of run time now, and i have fixed lots of issues, the code is good, but id hate to see any droid go wild. This code is used at your own risk, but i haven't had any issues and trust it. Good luck.
NOW OUT OF DATE
I will write up the wiring of the setup after CE2 and pad 2 are done.
Im so glad i upgraded it to the 193 commands, it gave me the chance to refine a lot of the functions. Really pleased with the results. :)
Sunday, 14 July 2013
The Warborough Festival AKA 3 hours on grass!
Well. A mixed weekend for R2.
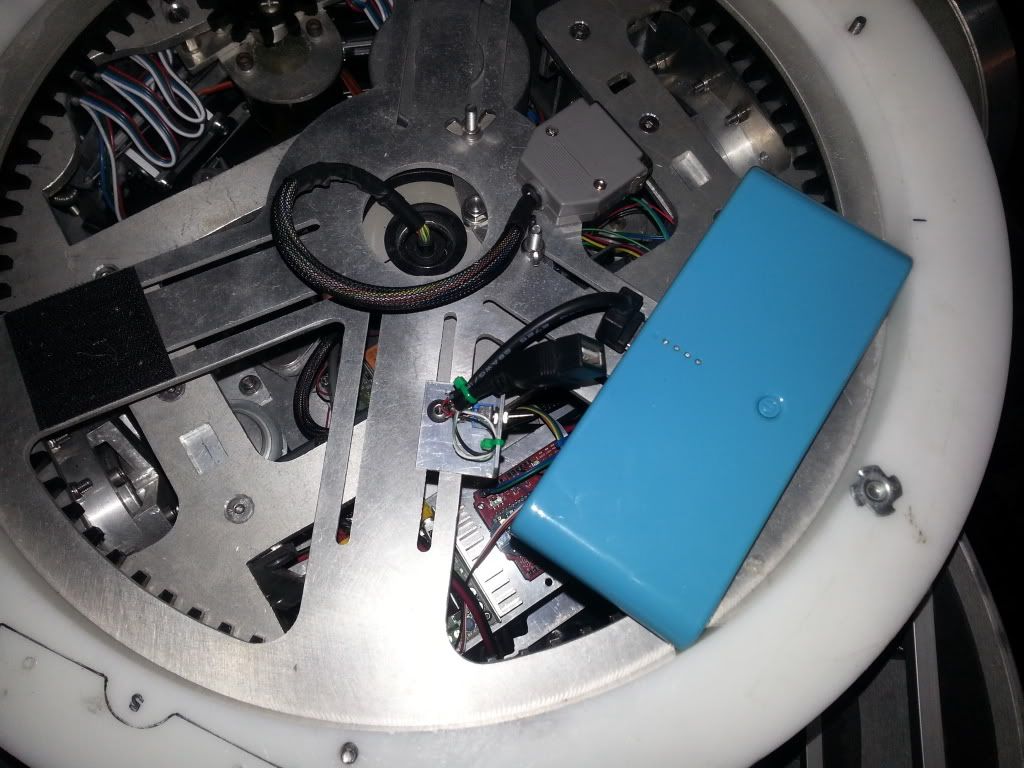
The 30Ah 5v packs arrived, only about 60% heavier than the 12Ah ones and they also have a power draw sense, so i only need one switch inline to turn the power on and off. I will need to do some work to fit it in the body, so decided to add one and a switch to the dome as a quick job. I used a short USB extender, and stripped it to add the switch on the +ve line. I then rewired the dome to use one USB lead as the power to both Teeces and servo controller. The switch is easily accessible with the dome facing forward and the back door open. And much easier than fishing around in the dome. :)

Then my car let me down, so i was forced to cancel another event for Saturday night. I was really disappointed i couldn't make it. it was for a charity about as close to me as it gets. Hope they repeat the event and i can go next time.
But that meant i had a fully charged and ready to go R2, so today i went to the village festival, and was soon convinced to bring R2 down. He ran on the grass fine for about 3 hours (all i could manage), the ground was hard and bumpy but R2 coped well and he was really well received. So much love. :)


The 30Ah 5v packs arrived, only about 60% heavier than the 12Ah ones and they also have a power draw sense, so i only need one switch inline to turn the power on and off. I will need to do some work to fit it in the body, so decided to add one and a switch to the dome as a quick job. I used a short USB extender, and stripped it to add the switch on the +ve line. I then rewired the dome to use one USB lead as the power to both Teeces and servo controller. The switch is easily accessible with the dome facing forward and the back door open. And much easier than fishing around in the dome. :)
Then my car let me down, so i was forced to cancel another event for Saturday night. I was really disappointed i couldn't make it. it was for a charity about as close to me as it gets. Hope they repeat the event and i can go next time.
But that meant i had a fully charged and ready to go R2, so today i went to the village festival, and was soon convinced to bring R2 down. He ran on the grass fine for about 3 hours (all i could manage), the ground was hard and bumpy but R2 coped well and he was really well received. So much love. :)


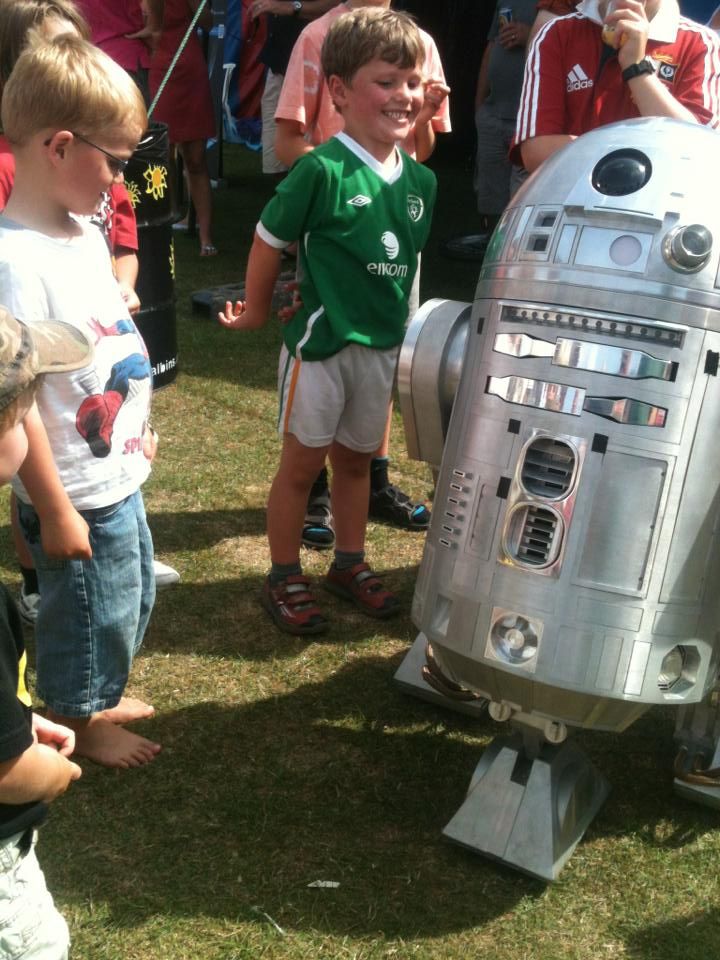
Me and R2 :D
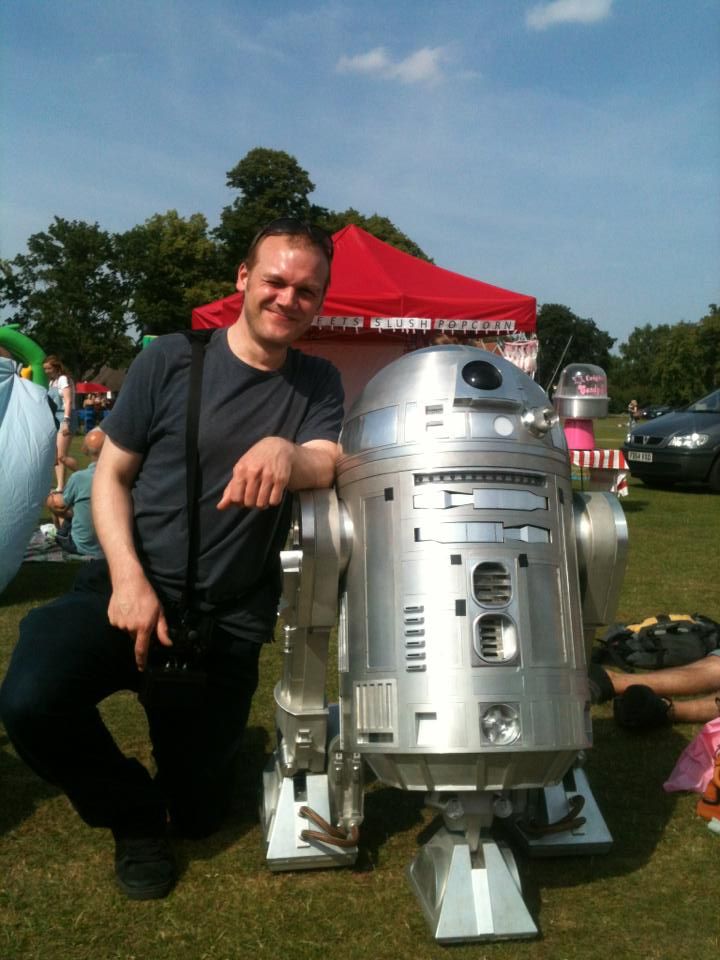
The new code all ran fine, no bugs at all that i spotted, the delay on the triggering while the dome is moving is a bit of a pain, i may have to look at seeing if i can put in a cancel for that to make it more responsive, the grass made no difference to run time, the extra drag didn't seem to make much difference, i just had to drive a little slower so that the door didn't bounce open, all the batteries still show as full after the 3 hours, nearly all with the dome random on. So it was a useful afternoon, even if i do now have to double check what has come loose. :)
Will make the final tweaks and upload the new code this week. But please don't post any spoilers if you go digging in the code. ;)
Subscribe to:
Posts (Atom)