Monday, 22 September 2014

Dome Service Complete

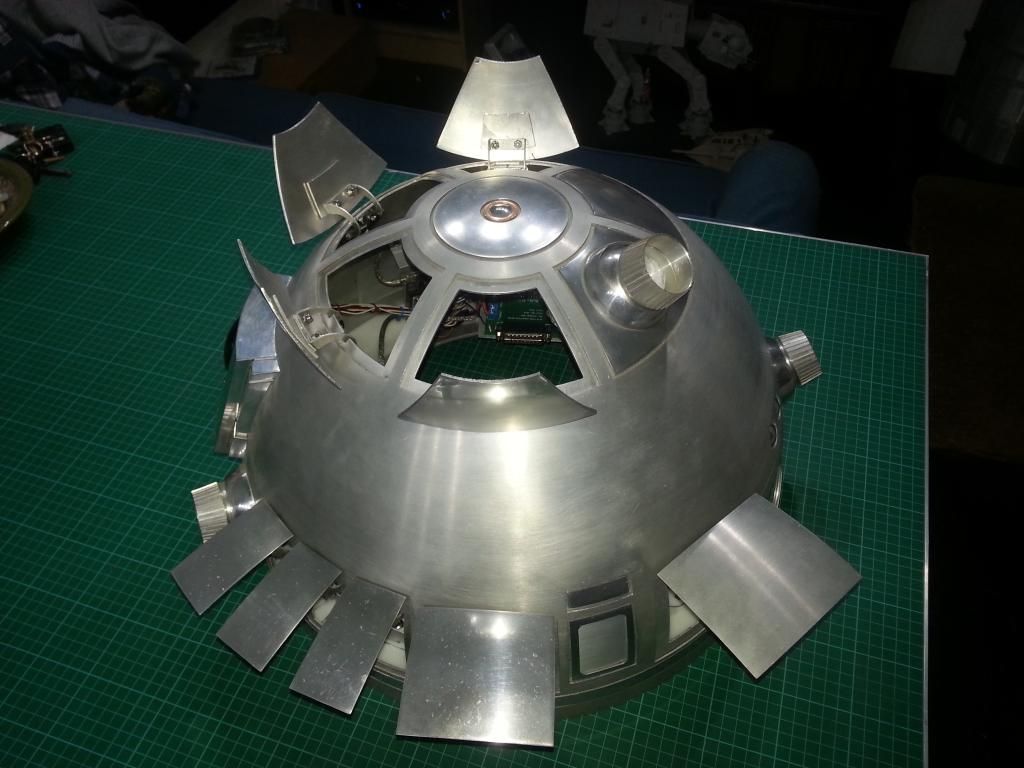
The dome rewire is finished.  That is a lot of wires. :D  The unit and but system makes it pretty simple to connect and follow the circuits, so it's not that bad really.

Here you can see how i used the slip ring board as the bus system, was a nice find that. :D  The I2C and DBC pass-back are in front, those go to slip ring wires, and in the back i have 1/2 as the I2C bus with the Blue/Green wires, and 1/2 as the 5v dome battery bus with the Red/Black or Red/Brown.
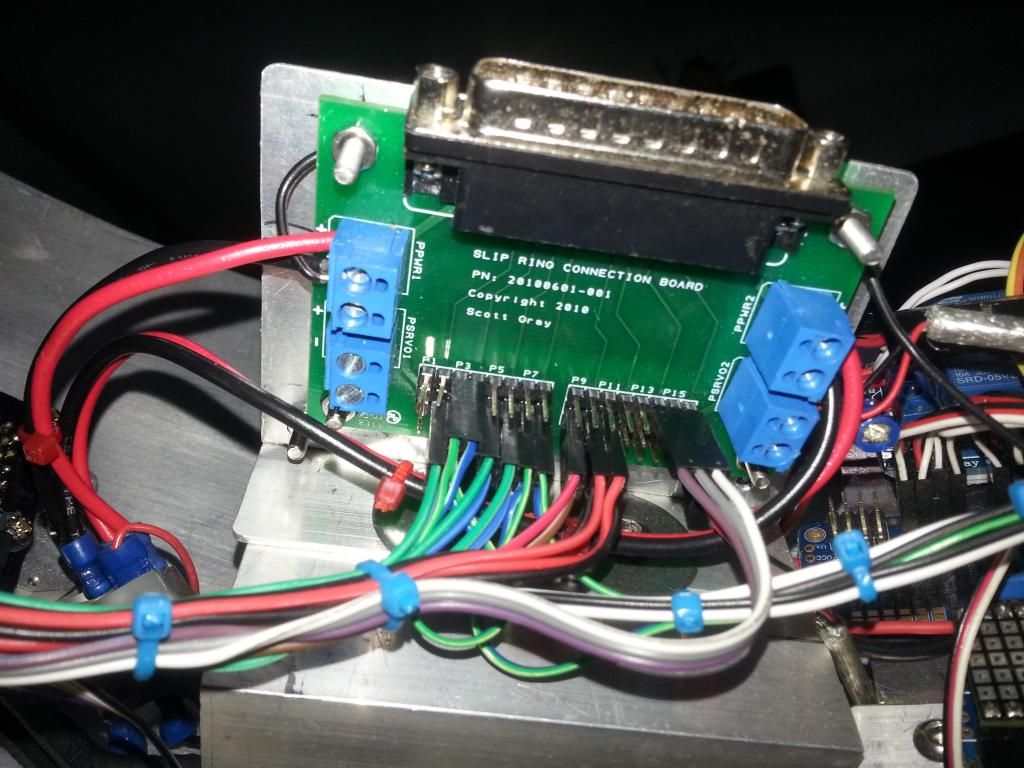


I currently use a pass-back on the DBC because i share the I2C address for all slaves.  I have been intending to redo the code for some of the units that need to talk back, but that is another job for another day.

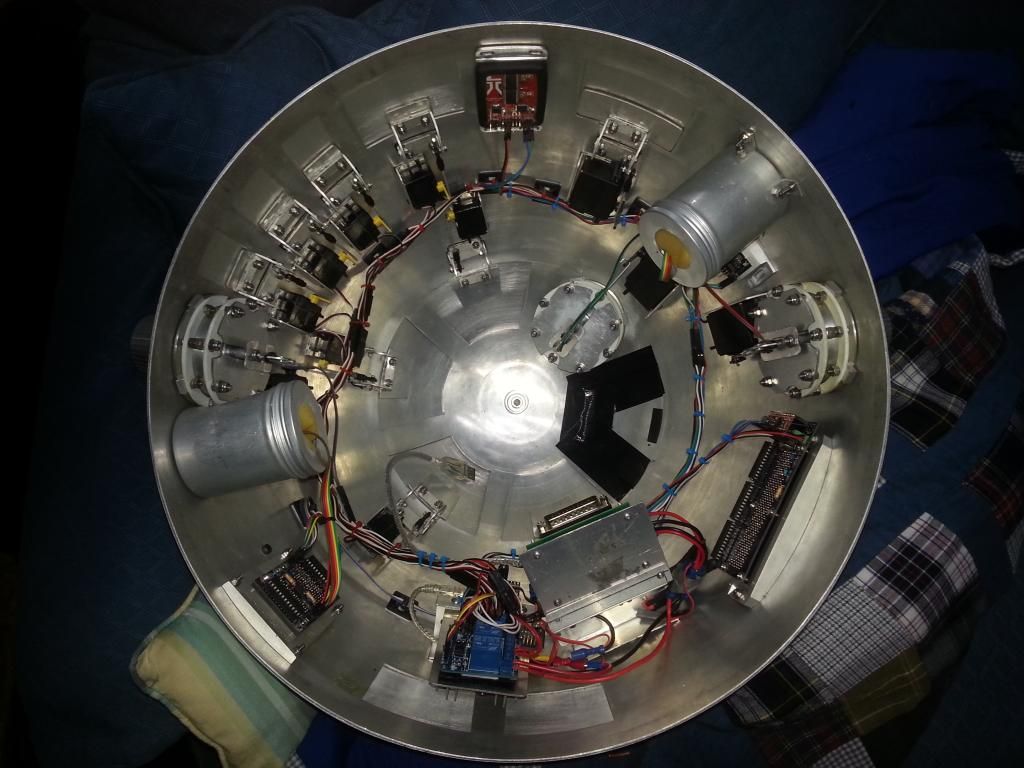
Here you can see the new servo/hp unit wired in.  It's the block almost hidden bottom right of the messy bit.  Much better.


Then finally the DBC and Rear PSI were connected and that and the Magic panel were connected to the Bus Network.  


Dome service complete.  All the wiring looms seem to be supporting the connections nicely now, so it should be more reliable, even when fishing about to turn it on. :D  Just sort the finer points of the code for Magic and DBC and the dome is back in action.


This mancave is making building life so much easier, no lost time looking for that missing part or tool, or looking for space to put stuff down.  Its such a different hobby.  The required patience is far less.  Just need to learn to keep it organized. ;)  

Sunday, 21 September 2014

Dome refurb/upgrades

A little more focus for the rest of the weekend. :D

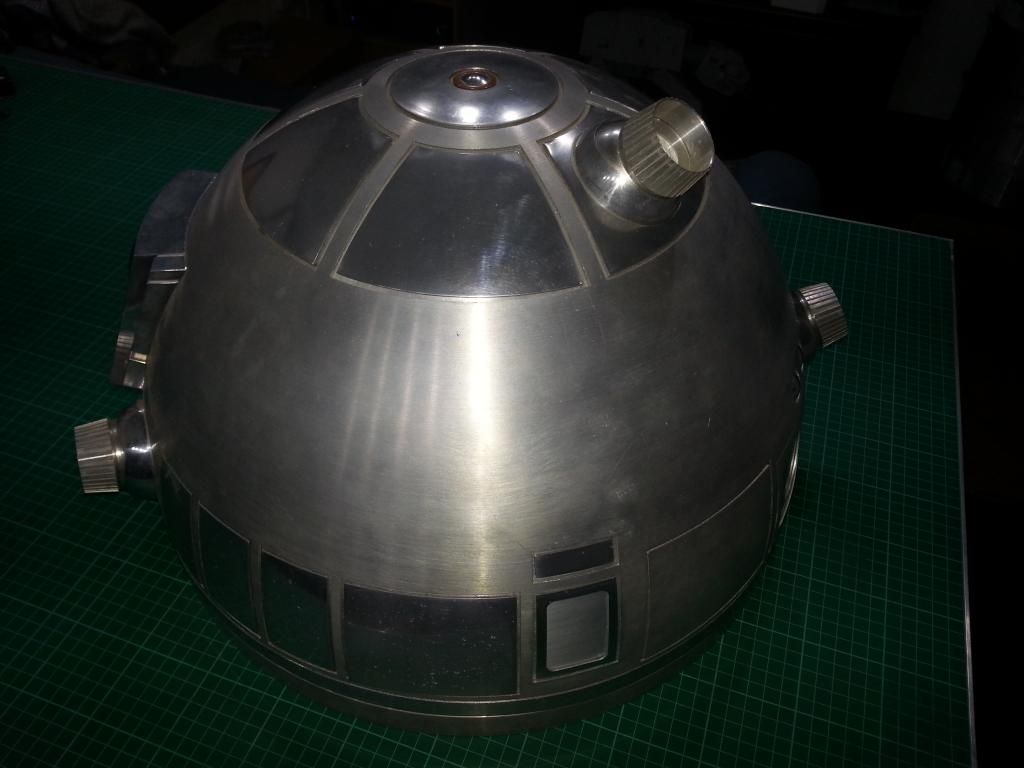
I started by removing all the doors, cleaning up the pads and then reattaching them, 2 years of flapping hasn't been gentle.  This time i added a padded tape instead of the VHB, i hope that will add a little damping, but they now all sit perfect;y again, and should do me the next 2 years no problems.

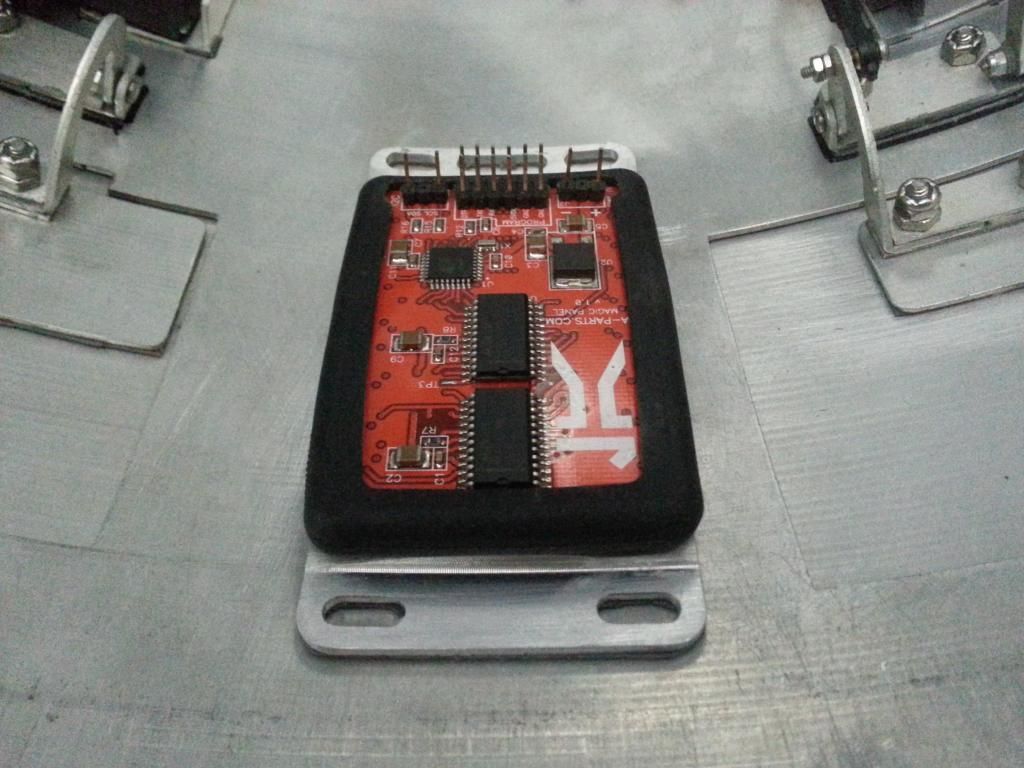
Then I had a look at fitting the Magic panel.  I marked the inner dome section seen through the trim piece, then marked up the hole needed, basing it on the trim piece so that it was all nice and central.  Then I covered the surrounding area in gaffa tape to protect the surroundings and got the dremel out.

So hole cut and everything fitting nicely.  So I applied the stickers and popped it all in place.  The lens was too far out, maybe .75mm.  So after a little play, I added some thick tape to the panel mount and stuck it into the dome using that.  All now sits beautifully and I'm really pleased with the result, it is more than strong enough and should allow it to be removed if needed.  I hope a little age will help blend it in better, but it already looks fine.


I then started to look at connecting it up.  I also have the Dome Bump Controller to connect, so i thought id look at the whole dome wiring set-up for the 5v and I2C in the dome.

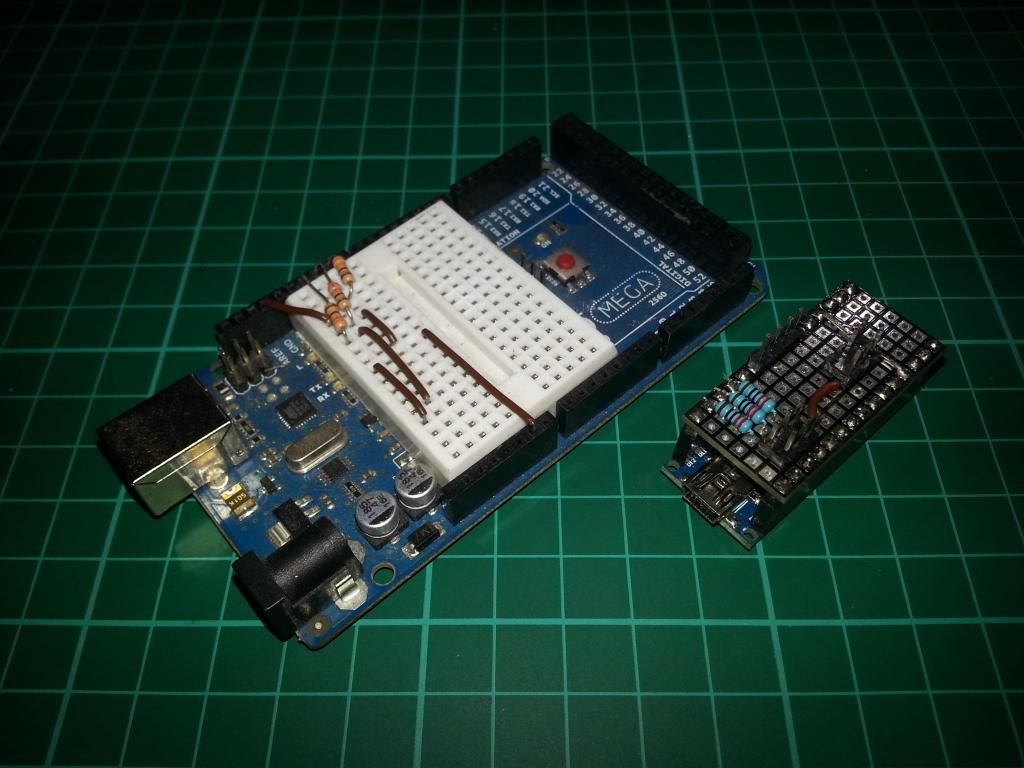
Thing that jumped out at me was the Servo/HP unit.  I was using a Mega and a mini breadboard, this was my test set-up and had just worked, so i hadn't refined it.  But the Mega wasn't needed and the wires keep shaking lose or getting pulled out as i fish about in the dome.

I found an old Nano i had used before, and made up a nice neat little shield for it to allow all the needed connections.  The space saving will be superb and the connections shouldn't shake lose now. :D  Here is the before and after:


Next was the power and I2C for all the dome units.  I flipped the Slip ring board mount so that that was better protected, and decided to use the bottom sections of the PCB as the I2C bus and the dome battery 5v bus.  I then set about chopping wires and re-routing stuff, Almost there now, just a few more bits to connect and tidy and i can give it a test. :D

Then finish the finer points of the coding for body servos, Magic panel, dome bump controller and master, a shed load of testing and i will be ready for FACTs, and free to get back to the upgrades. :)

Friday, 19 September 2014

BHD 3.0 Well Under Way

As always happens i got sidetracked again.

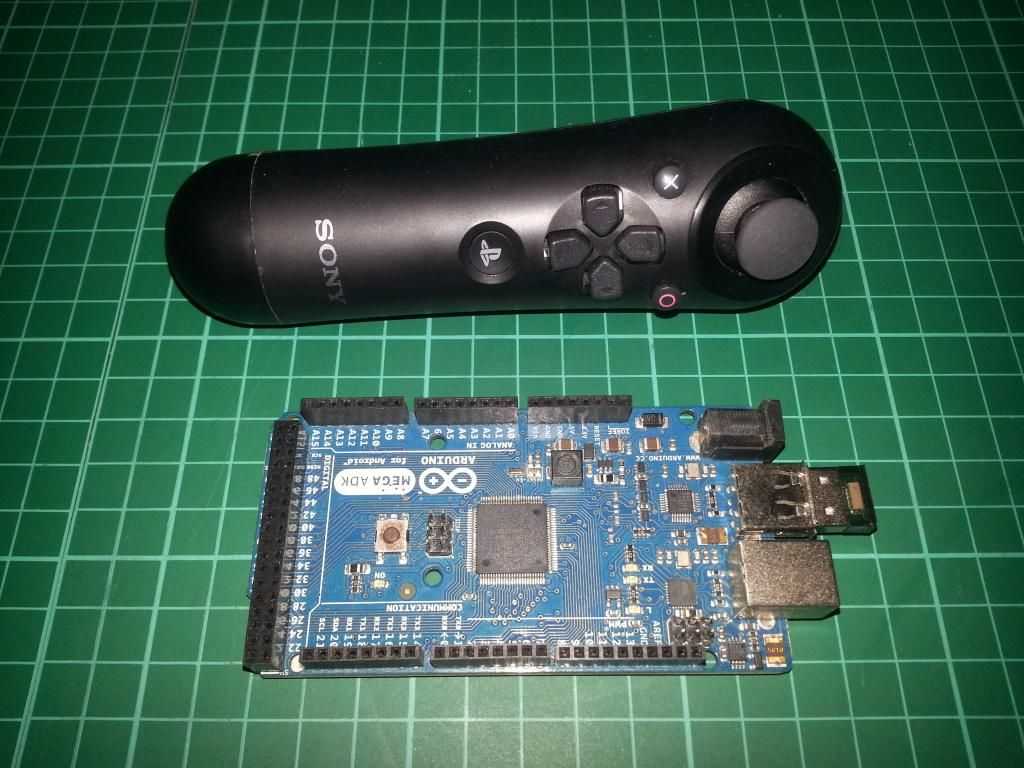
I must do a few jobs on R2 for FACTs, but when starting, I opened the Arduino IDE, got out the spare boards and my MEGA ADK was looking at me.  I had ordered a PS3 Nav Controller and a good Bluetooth dongle a few weeks back, but hadn't looked at them.  What could be the harm of booting up the example sketch and trying the PS3 controller library?


An hour or so later I had that running.  But the library wouldn't work using the style of coding I had used before, so I was forced to adapt.  I now have a much better grip on the timing approach. :)  Should serve me well and I may well redo some of the droid code to refine the whole core.

A little over a week later I have the PS3 Dualshock3 and the PS3 Navigation controller working superbly, all coded up to send the droid script numbers and the stick values 50 times a second, while also outputting to the PC for debugging.  I added a time-out to disconnect the pads after a set time of inactivity, and watching the output of the pad you could see the errors, so I added code to avoid the errors and disconnect if continues too long.  Either controller can be used, and you can swap without touching the XBee box.  The Dualshock is the same as my old PS2 setup and I have 32 script options and a couple of cool extras coded into the Nav code; hold L2 to change the drive type, and an extra step to protect the 2-3-2 command.  Should be great for shows, going on patrol with the Nav and having the option of complete control via the Dualshock for really showing off. ;)  I add an LED I could flash to represent the pad connection and show when buttons are pressed, then 6 more LEDs, 4 to represent the status that the old PS2 setup screen was used for, then a couple more, played with the code and got the 4 LEDs on the Dualshock working alongside 4 of the arduino LEDs.  These Dualshock LEDs cause a delay of 0.47s when triggered, so after a lot of thought I decided that the only issue with that was drive control, either dome or feet, so I added some code to wait for 0.8s of no stick usage before flipping the LED, so if not moving the sticks the LED will change immediately, and if driving it waits.  I also added automatic status changes when switching on the Nav, as that wont have some of the control options needed.  Works like a charm.  I made a little end shield for the Mega and added the LEDs there.  So I now have an LED on the XBee/bluetooth setup for each of the following:
1.  Leg Mode (on for 3 Leg, will default to 2 Leg i.e. off, if no droid connection)
2.  Random Dome Motion
3.  Random Sounds on/off (Also Left LED on Dualshock)
4.  Speed Mode Fast is on, slow is off (2nd LED from the Left on the Dualshock, slow if Nav)
5.  Feet Drive on/off (3rd LED from the Left on Dualshock, on if Nav)
6.  Dome Drive on/off (4rd LED from the Left on Dualshock, on if Nav)
7.  Pad Status LED, flash slow if off, boot flash and handshake flash, on if pad connected and 0.5s off when a script command is sent.


I have been planning a few upgrades for a while.  The plan is to use the PS3 pads, and have an XBee/Bluetooth box with a touch screen, so you get the benefits of the pads but the range and reliability of the XBee.  The screen will have the option to mount into the data door and the Nav into a pie panel, so the Nav can be presented by R2, and I can either have Bluetooth range or take the box out and use the better XBee range. :)  Best of all worlds.  Short term I will mount this in a box, with the LEDs in a line below the screen, and have an external battery, long term it would be great to shrink it and have the screen box a total of about 25mm thick, including the battery and Lipo charging circuits. :D

So i made a start looking at the screen.  I have a 4.3" 4D Systems screen, I think i can use the current setup with the screen and have a total thickness not including battery of 33mm ish, so it wont be too bad.  Just need to get a handle on the code for the screen and see about making an interface. :D  I think I will try and get that working and so the pocket box code ideas will all be proven before i move onto the droid side.  Here is a few shots of the setup so far:


These things are never without their hurdles, and I found one after the Nav battery got low.  I went to charge it using a standard USB 5v feed, but nothing. :(  After some research, I found that the PS3 pads need to talk to the charger and handshake before it will charge, there are no hacks that I could find, and no easy way out.  PC with Driver disabled or PS3 or AC adapter dock.  But I had a cunning plan. :D  I got on eBay and looked for PS3 AC adapter based charge docks, the hope was that the AC would be a dumb 5v and there would be an internal PCB.  The first one I tried, made by Duracell was just that and Perfect for the job. :D  So I can now add this into R2 and have the Nav charge while in the dome, and wire a dock for the Dualshock somewhere too. :D  


I will be bringing this set-up to FACTS as a board droid, so i can test the Bluetooth range and stability in the worst possible conditions.

Really enjoying being back in the code and testing.  But I have to put this aside and get R2 running, I will potter with the screen over the next few weeks and update you when I have some screenshots and video. :D


Thursday, 11 September 2014

200 Subscribers :D

Like an invisible barrier, my subscriber count has hung at 195+ for the last month or 2.  But finally i made it to 200. :)

33000 views too. :D  Not too bad. :D

https://www.youtube.com/user/I8U2Astromech

Please subscribe if not already done so.  I have a few vids to come this winter.  Lets hope it snows. :D

Sunday, 7 September 2014

Body servo arms and Volume Octo

The Mancave is finally in a usable state, I've just part finished the workbench and still have a few bits to do, but couldn't resist getting sidetracked on a few R2 jobs, I will finish the cave after FACTS. :D  The cave is making things so much easier, not having to look for things, even tidying up is a pleasure.

Having used my battery boxes to get the new feet done, I have been waiting for the bits to redo them.  Last week I fitted the new battery boxes, they are a touch smaller then the last ones, and were a right pain to get the senna drives into.  I may look at adjusting the NPC position to help long term, but for now I forced them in and ground them back a little.  Need to refit the hoses and fittings, and find some harnesses, but they have a much better finish than the last ones, and look spot on. :D


Started this weekend by stripping him, got it back to the skinless frame and had a good look over the leg lift.  Lots of loose/missing bolts, and a bit of levelling needed, hoping that will be loads better.

Then started looking at the servo rods for the body doors.  The base code and servos have been in and working for nearly a year, but not connected.  I got the 2 right side ones done first.


The left was a little trickier, the CBI door has had a few knocks and pulls, and so needed remounting and repairing.  So got that sorted and made up the other servo rods, but got distracted and didn't finish those 3.

While working around the the utility arms I spotted an easy upgrade, I've been pondering these for a while.  The while open protection spring is great, but the kids like to try and fish them out when closed, especially once they have seen the open, but when powered they end up bending the connecting rods.  So I added 2 layers metal of tubing over the rods to reinforce them.


That then got me thinking, if pulled now they just break something.  So I decided to add the body door servo relays.  Splitting the power to Utility arms and Doors on the 2 relays.  So when I sort the code, the arms wont be powered unless moving or open, and so the servo will move and not break anything, like the dome doors.  Much better. :D


Then I remembered the feet and dome relays, these have been tested and will really help with overall safety and ESC protection. Got those fitted and was on a roll.


Another job was needed...  

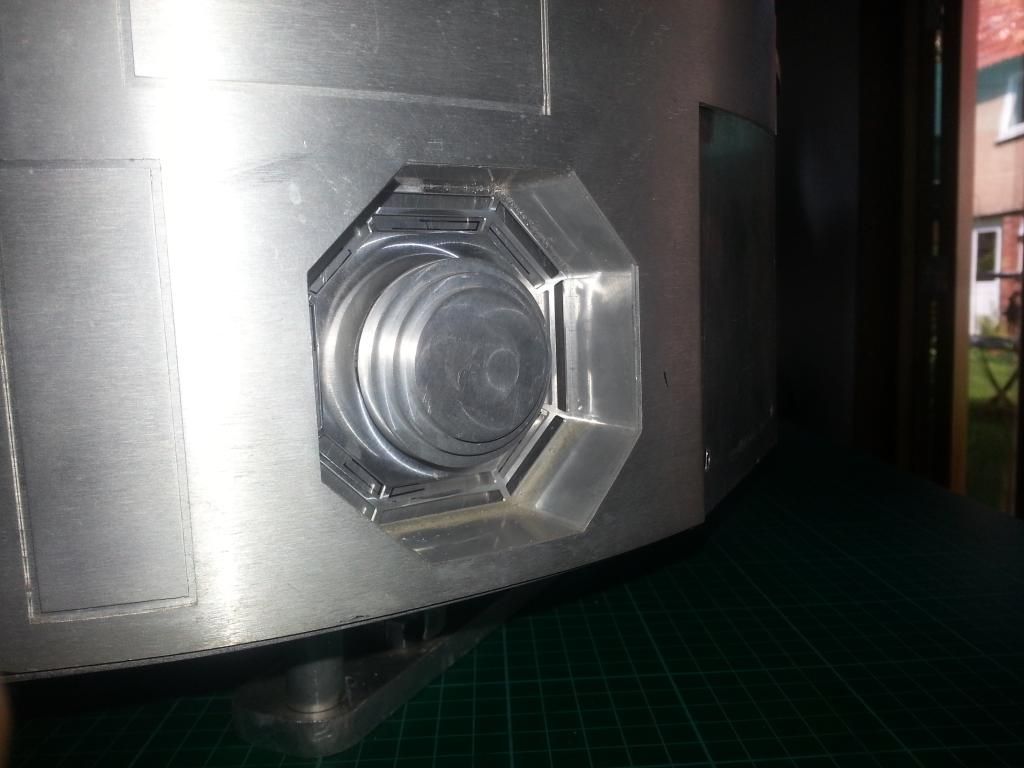
An idea from long ago was staring me in the face.  The volume knob I have is currently in the big door to the right of the centre vents and once the servo is powered will be a pain to open the door to access the master volume.  But I've wanted to use the octo port as the volume knob forever.  I had a good look over the octo and decided to go for it.  I got the Powerfile out and ground out the main knob.  Luckily, the original volume knob was only about .5mm too big, but has an ali skin, so I ground it down a little and smashed it in to the back of the octo knob with a rubber mallet.


So then I went to move the PCB and I broke it. :(  Managed to knock the top off the encoder stick. :(  I popped it back together, but fingers crossed that it still works, looked like physical connections, not electrical.  But even if I need to replace that the idea is sound and you would never know. :D  I used a 3mm ali bracket to give it some rigidity, and mounted it so I can still get the skins off by removing the knob.


See, not a clue!  :D


Then I finished off the other 3 rods, opened a few of the holes to help the rod fit and fixed the front skins back on.  All the doors look great.  Will tackle the code and testing this week. 


So that is 5 doors all opening and closing manually, but nicely, 5 relays, volume knob and a few little TLC jobs done.  Pretty much a body service. :D  Just needs a code, testing and a clean up. 


Hopefully next weekend will stay clear and I can get the dome sorted.  Id love to fit the Magic panel and connect the DBC into the system. :D  Then I really need to work on a few more dance scripts, that Cantina dance is wearing thin!

Monday, 7 July 2014

Pad Upgrades

I have been looking at the pad setup on and off for a while.  Trying new methods, different arduino/xbees, boxes, configurations etc.  

But Felix is working away on a custom PCB for the BHD setup that will make a big difference to the pad set up.   While awaiting that i was told that the Floureon batteries i was using are now hard to find.

The key thing with a battery is that it has on/off not just on.  And also that the minimum current draw of the battery allows the pad to stay on.

So i ordered the direct replacement:  New Floureon Battery

This is smaller, lighter, the same power and functionality.  So free positives. :D  Also this battery includes a torch option, so another useful addition.

The new BHD 2.0 wiring only needs one USB supply on the pad now, so this weekend i swapped the battery over and redid the leads.  It is much better.  The weight is down, the balance is improved and the overall footprint is less. 


Thursday, 5 June 2014

The next droid, this time R2-D2

Well its been a while.  But i have been working on droids. :D

James Short and i have started on our next droid.  We have done the cosmetic droid building before, and we have added gadgets etc.  So this time we decided to go back to basics and look at the whole concept of droid building from the ground up.

We want a droid suitable for any event.  Be it rough tarmac, brick or slab courtyards, grass, sand, gravel even snow.  So the first decision was to make it off road capable.  To achieve this the droid is going to be light, we are aiming for around 30kg, the centre of gravity will be low with light body and head and heavy feet.  This droid should be a first in the group using these ideas and we hope very stable, no matter the surface or terrain.  We have already finished the track based feet drives and 3 forms of suspension so far.

Eventually this droid will have up to 3 different swap out feet drive systems.  With several options for the centre foot too.

The other thing was that we wanted the ability to display or transport this droid in 2 leg mode.  So it has a quick release centre leg and the outer legs can be re-attached in the 2 leg position.

The feet are aluminium, NPCs will be the driving motors and so the feet will be heavy.  The body, dome and legs will be composites and so light and durable.  We have made a concession to use everything that looks aluminium as aluminium (except the dome), so the weight will not be as light as possible, but the look of the droid is important to us and we want it to be as good a droid as it can possibly be, while still breaking new ground and doing things differently.

The paint scheme will be R2-D2 this time, and we will be lightly weathering him, more to highlight him than to make him look like he just rolled out of the swamp.  I am excited to be finally painting a droid.

We have 80% of the bits needed and those parts we have ready are untested but look superb, i cant wait to share pics of real progress.

Working on this droid together means the blogging may be done elsewhere so we can both contribute,  i will add a link here to the new blog as soon as we have all the parts needed and can start the build proper.

In the mean time here is an appetizer to keep you going: