
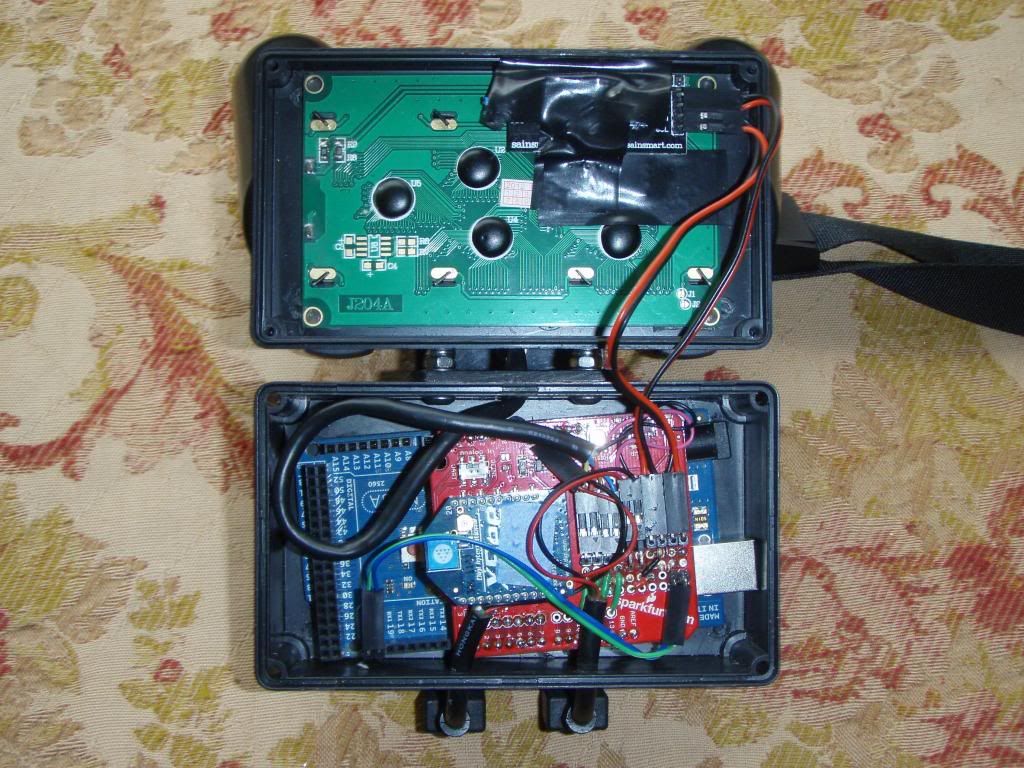
So I started by redoing the screen mount so that it sticks out giving more room in the box, then I made up a shield to do all the wiring instead of using connector blocks and the explorer board for the Xbee Luckily it all fits, so I now have a standard mega running the pad end and as my code is almost too big for the 32K chips already it will allow growth too.

I also tracked down the Pad crashing. It is the PS2 library, something to do with the trigger buttons, but I found if I do R2+Triangle, then Triangle after boot up then the pad runs without crashing no matter what I do. I think it's the way it allocates memory.
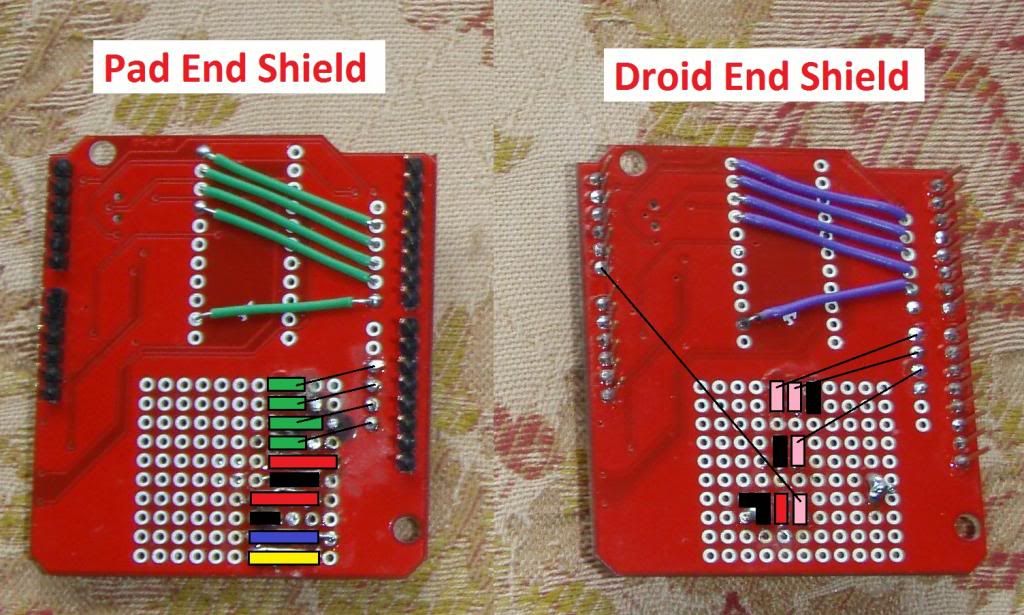
I had been asked several times about what I am using. So I have started to document it. Below are the main droid and pad shields. The Droid one connects to all the slave Arduino via I2C, so the MP3, Dome Servo, Teeces etc all have their own set-ups. These shouldn't change much. The extra stuff is done via the slaves and the code.
I don't recommend doing this unless you are willing to learn some Arduino code, it isn't perfect and I am still working on it, so while I will try and help where I can, if its something I haven't yet finished you will have to wait, and I took a while to get mine working flawlessly so please check your wiring with a meter and make sure wiring isn't the issue. 99% of the problems are wiring, it needs to be perfect. Once mine is done i hope to rejig the code to make it a little more user friendly. :)

So to get started the BOM would be:
1 x New PS2 Wired Pad (don't bother using an old one, its tricky enough when you know it should be good)
1 x I2C 20x4 LDC Screen - Ebay
2 x XBees, I used the XBee Pro 60mW Chip Antenna
2 x XBee Arduino shields
1 Arduino Mega for Pad end
1 Arduino Uno for Droid Master
1 x 5200mAh 5v Power Bank Battery to drive Pad
2 x 90 degree USB leads to run from battery into pad
1 x 90 degree plastic bracket, the ones i used came on a packing crate to protect the contents from the plastic straps.
1 x Plastic box to fit Mega and shield, i got mine from Ebay.
2 x 2.7K I2C Pull Up Resistors
1 x 10K PS2 Data Line Pull Up Resistor
Solid core wire and header pins to wire up shields.
Crimp terminals, blocks and wires for all patch leads.
1 x Sabertooth 2x25
1 x Syren 10
Optional Round soft pot for dome position control and wiper.
Do you sell you R2 robots or do you sell just the physial components
ReplyDeleteHi, no I dont sell anything.
ReplyDeleteI just buy off the shelf stuff to do what I need and make it work for me. I hope to make the code easy for you to use for your robot, and to copy my base hardware for a good head start. :)